Premiere Pro is a powerful video editing software used by many professionals. However, one common issue that people have with it is choppy audio playback.
This can be caused by a number of factors, including incorrect settings or a low-powered computer.
It can be a very frustrating issue to deal with, but luckily there are a few simple solutions that can fix it in no time.
Before we get into it, one thing you may want to verify is that you’ve got your project set up the right way. Here’s a quick walk-through on the best settings for Premiere Pro. I recommend checking that out at some point before you get started!
In this blog post, I will show you how to fix choppy audio in Premiere Pro so that your videos sound smooth and professional.
First, let’s examine the most common reasons why you may be hearing choppy audio and some quick and easy ways to solve the problem.
What causes choppy audio in Premiere Pro and How To Fix It
There are a few different reasons why you might be hearing choppy audio in Premiere Pro.
The most common reason is that your computer doesn’t have enough power to handle the video file you’re trying to edit.
If you’re working with a large and complex file, it can quickly overwhelm your computer and cause choppy playback.
Here’s how to fix it:
Make Sure Your System Settings are Optimized
It could be that your entire system is lagging on playback, and this is making the audio sound choppy.
Let’s look at a few quick steps to make sure your system is functioning at full capacity before digging into other solutions.
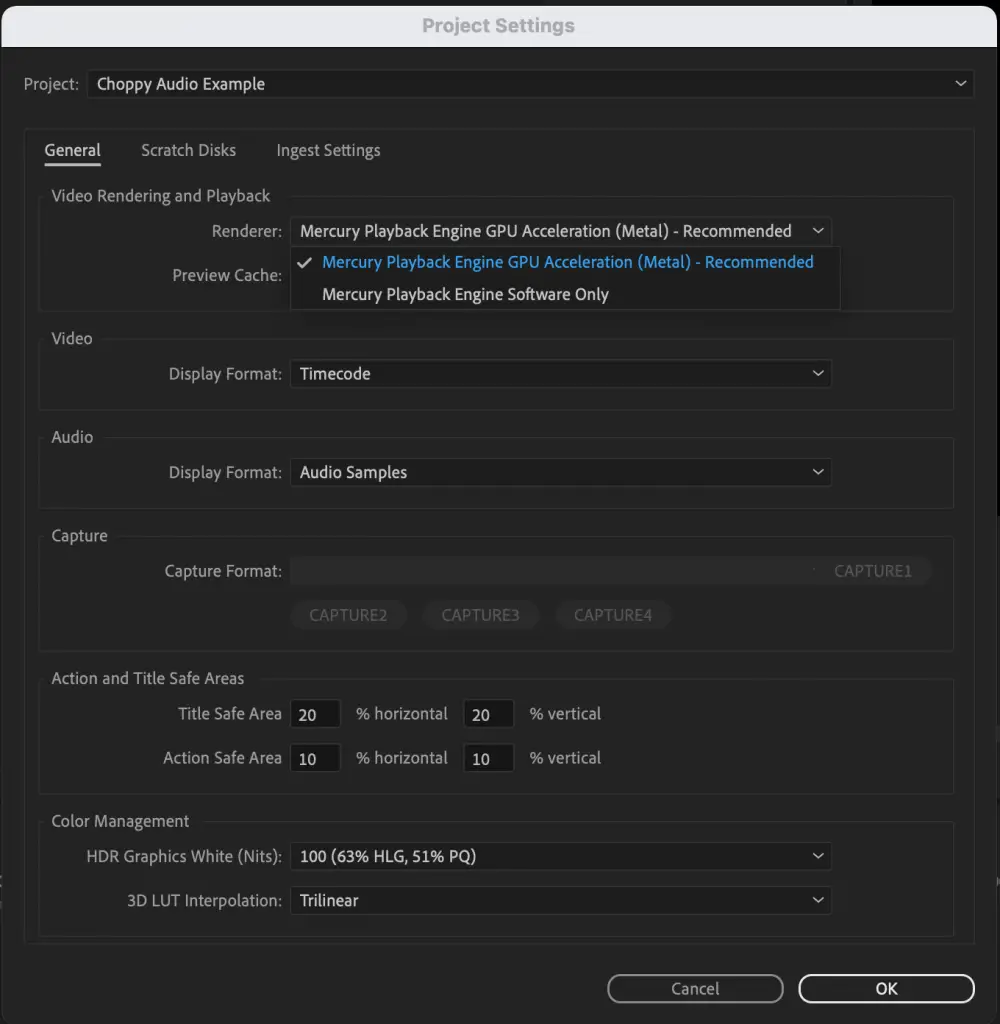
1. Check Video Rendering and Playback Settings
Inside your Premiere Pro editing panel, navigate to File –> Project Settings –> General
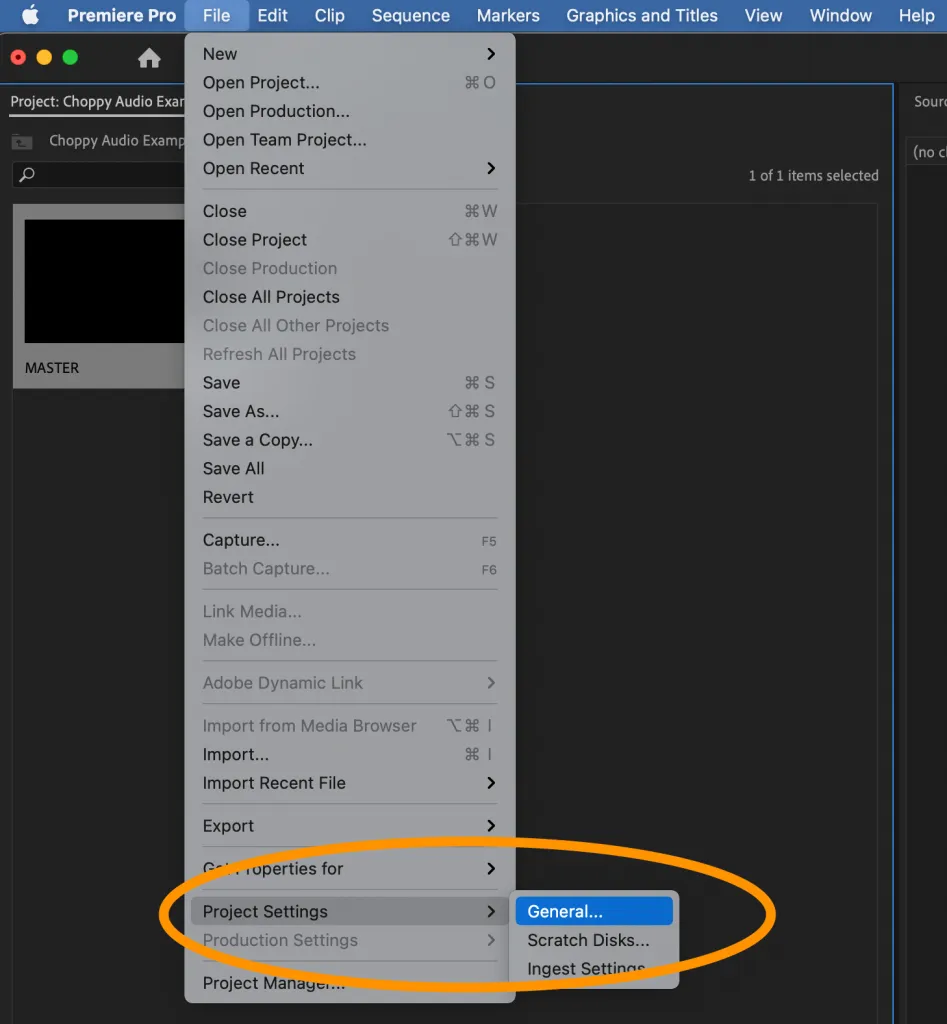
Under the General Tab, look to see which renderer is selected under Video Rendering and Playback.
If you see Mercury Playback Engine Software Only, change that to Mercury Playback Engine GPU Acceleration.
The parentheses may contain (CUDA) or (OpenCL) or (Metal) – any of these are fine. Select that option.
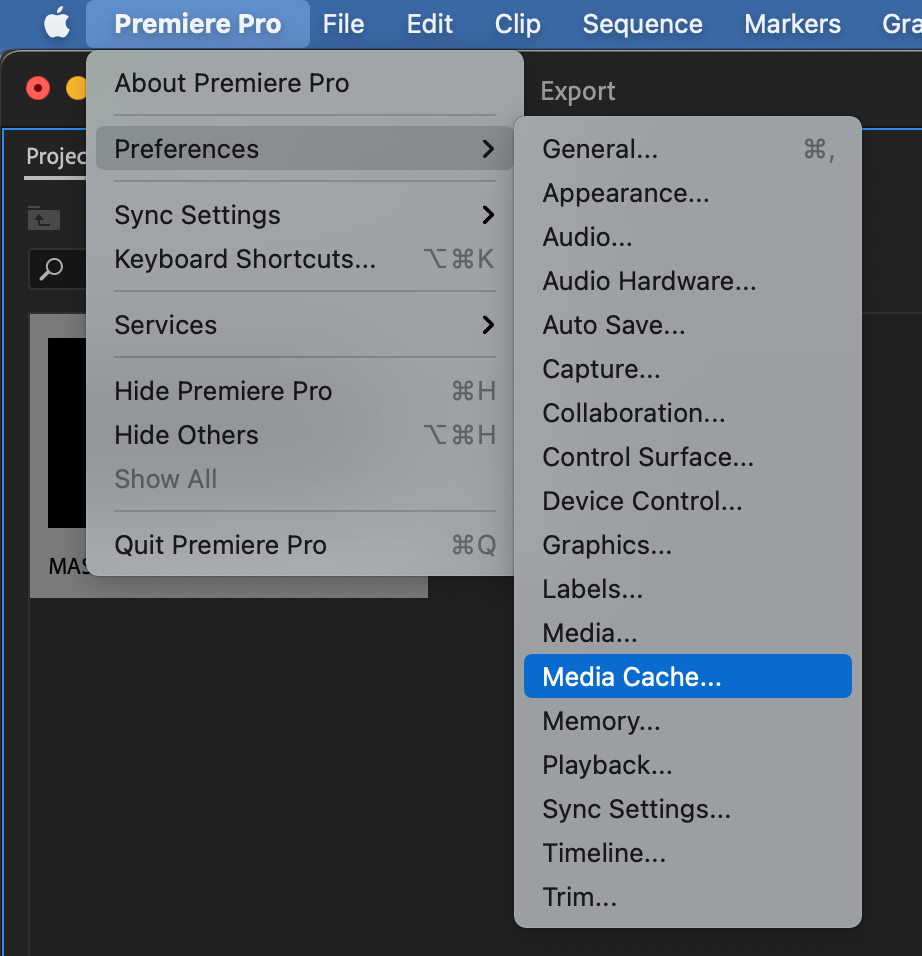
2. Clear Your Cache Files
Media Cache files are useful in some ways, but definitely not necessary. They are created to help your current project run smoothly, but over time old project cache files will begin to bog down your system.
It’s best to clear your cache files out every so often to make sure it isn’t overloading your system and making playback worse.
You won’t lose any pertinent files clearing out the cache. Premiere Pro will recreate these files if you need to get back into older projects at another time, so no worries.
Head up to Premiere Pro –> Preferences –> Media Cache
3. Render Your Current Project Sequence
One of the best ways to avoid choppy playback is to render your project as you are editing.
Rendering essentially pre-processes your video file and makes it easier for Premiere Pro to play your audio and video files back smoothly.
To render your project, go to Sequence –> Render In to Out

Once your project is rendered, you should be able to edit without any issues.
Another helpful tip is to close any unnecessary programs that are running in the background.
Having too many programs open can quickly overwhelm your computer and cause choppy playback.
So, if you’re not using a program, close it to free up some resources.
If you are still noticing choppy audio or playback issues, let’s explore some deeper solutions to the problem.
Best Audio Settings for Premiere Pro
Another common reason for choppy audio is incorrect audio settings.
Premiere Pro has a lot of different settings that can be customized to your liking, but if you’re not familiar with them, it’s easy to accidentally change something that can cause choppy playback.
The good news is that most of these settings are easily changed.
Make Sure Your Audio Settings Match Your Sequence Settings
You want to make sure that your sequence settings match up with your sequence settings.
This can easily happen if you’ve already set your sequence to match existing footage, for example, that has a different sample audio rate than another piece of audio.
This is an easy fix and just takes a minute to verify.
Start by right clicking on your audio file in suspect. And navigate to the properties window.
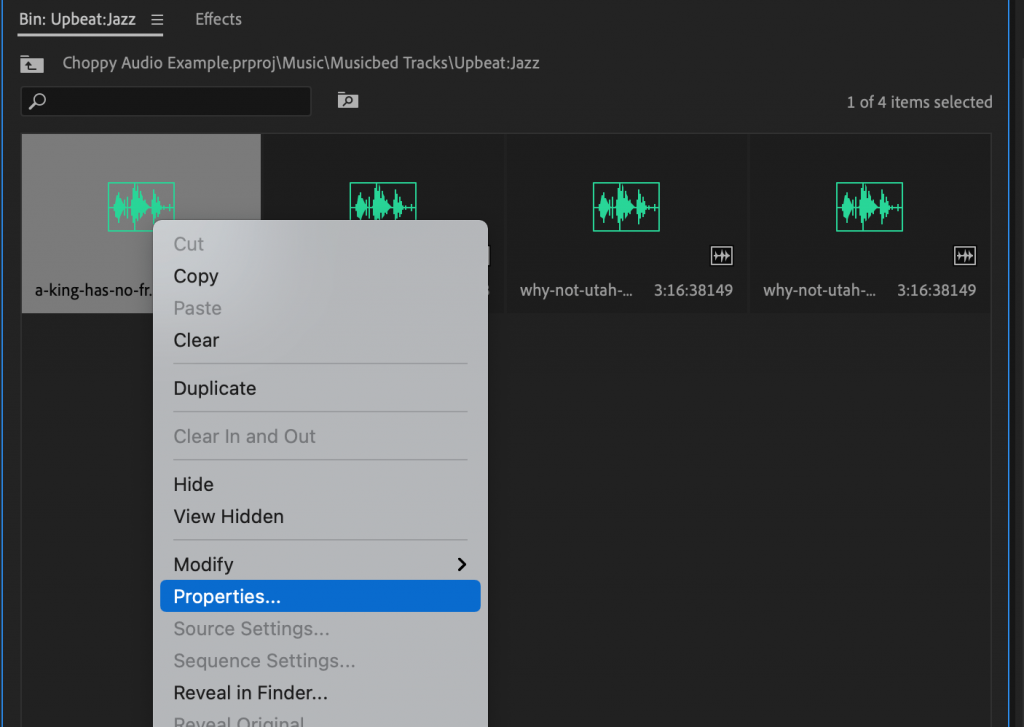
Take note of the number of Hz here.

Now right click on your sequence file and navigate to ‘Sequence Settings’.

Take note of the Sample Rate in the Audio section of this window. If it doesn’t match your audio source file that you just looked at a moment ago, you can adjust it here so they match.

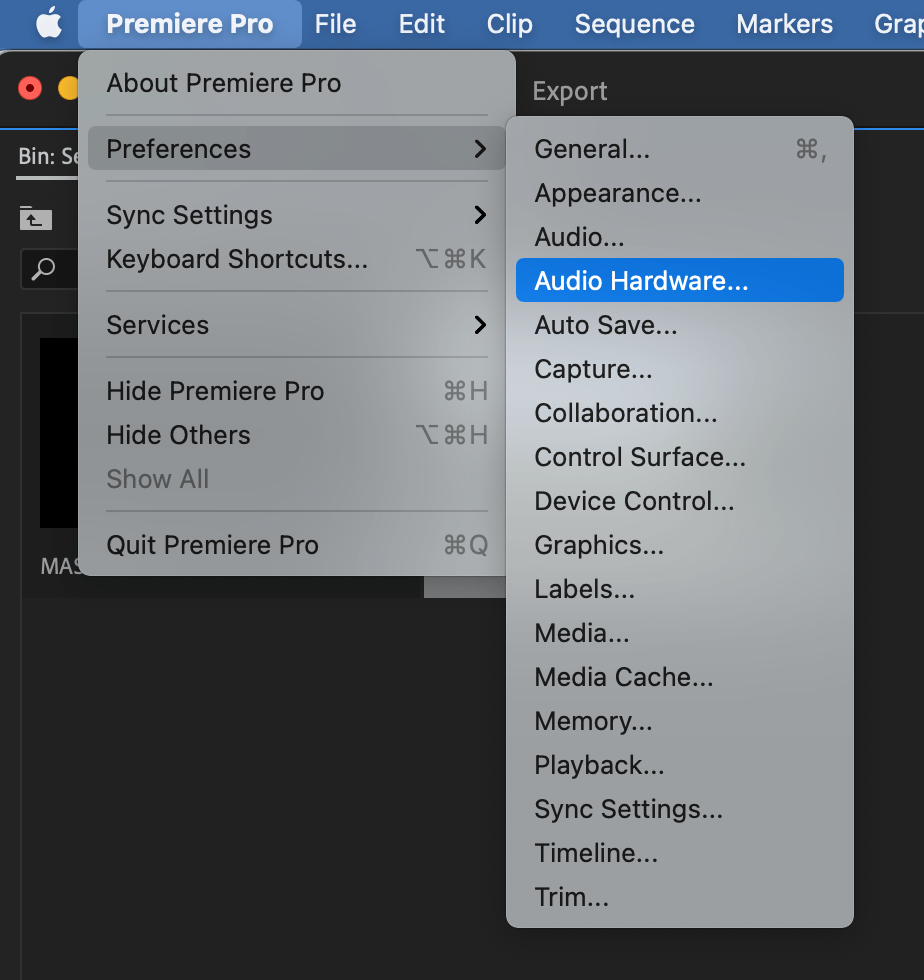
Adjust the Audio Hardware Input
If that doesn’t work, let’s try adjusting the audio hardware input.
Navigate to Premiere Pro –> Audio Hardware
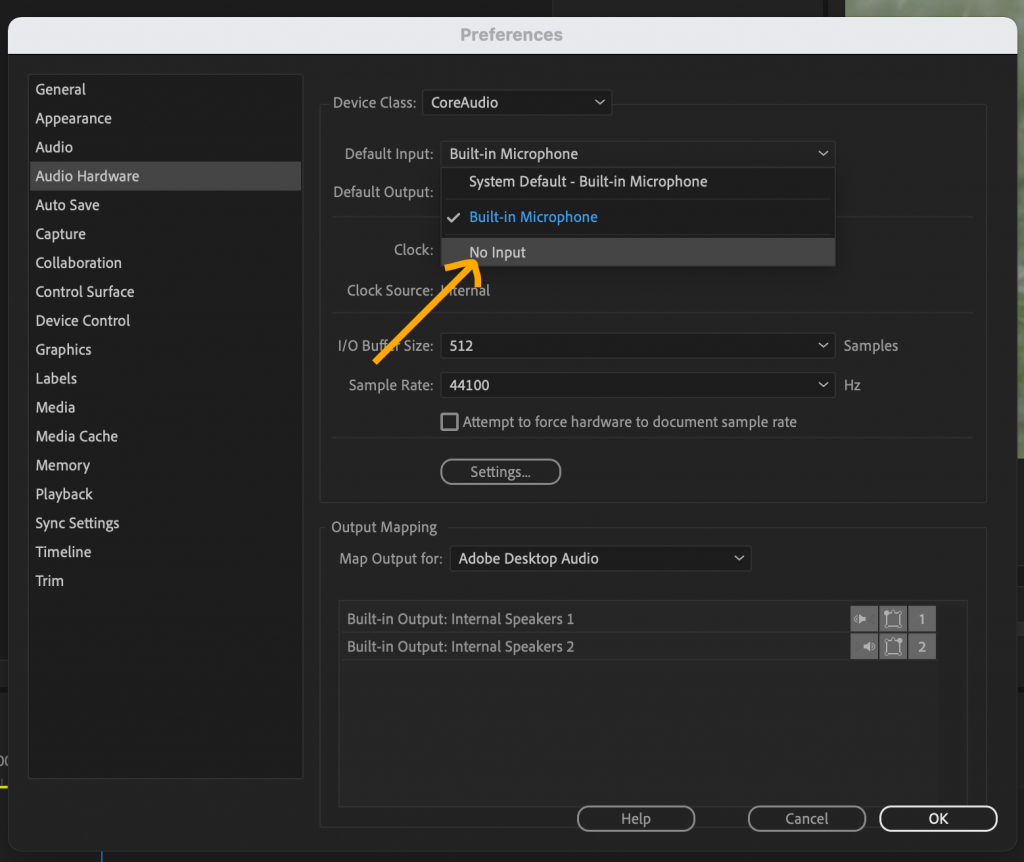
Select the Audio Hardware tab and make sure to select ‘No Input’ on the Default Input option.
Head back into your project to test the audio once more. Remember, you may want to save your project and reset after each of these steps before you can discover what’s working.
Tips for avoiding choppy audio in the future
Now that you know how to fix choppy audio in Premiere Pro, here are a few tips to avoid it in the future:
– Always render your project before you start editing.
– Close any unnecessary programs that are running in the background.
– Ensure that your computer’s internal settings, as well as your Premiere Pro settings are optimized for best performance.
– Check for software updates regularly.
By following these tips, you should be able to avoid choppy audio in Premiere Pro and keep your videos sounding smooth and professional. Thanks for reading!
Do you have any other tips for avoiding choppy audio? Let us know in the comments below!
Want to learn more about how to edit videos in Premiere Pro? Be sure to check out our blog for tons of tutorials, or start with this beginner video lesson: Learn How To Edit Videos With Premiere Pro For Beginners.