When working in multiple platforms, it’s not uncommon to need to adjust the aspect ratio of your video.
The good news is adjusting framing and aspect ratios isn’t complex or complicated. It’s actually super simple and easy to adjust in Premiere Pro.
In this blog post, I will show you how to change aspect ratio in Premiere Pro with just a few clicks. I’ll also provide a few tips on how to choose the right aspect ratio for your project.
Here’s an overview of exactly what we’ll cover, so you can scroll down to what you need:
- How to Set the Aspect Ratio for a New Project
- How to Adjust the Aspect Ratio of an Existing Project
- How to Know Which Aspect Ratio to Use for Your Project
Let’s get started!
What is Aspect Ratio?
The aspect ratio of an image or a video clip is often thought of as the size of the image, this is incorrect. The aspect ratio is more accurately described as the ‘shape’ of the image.
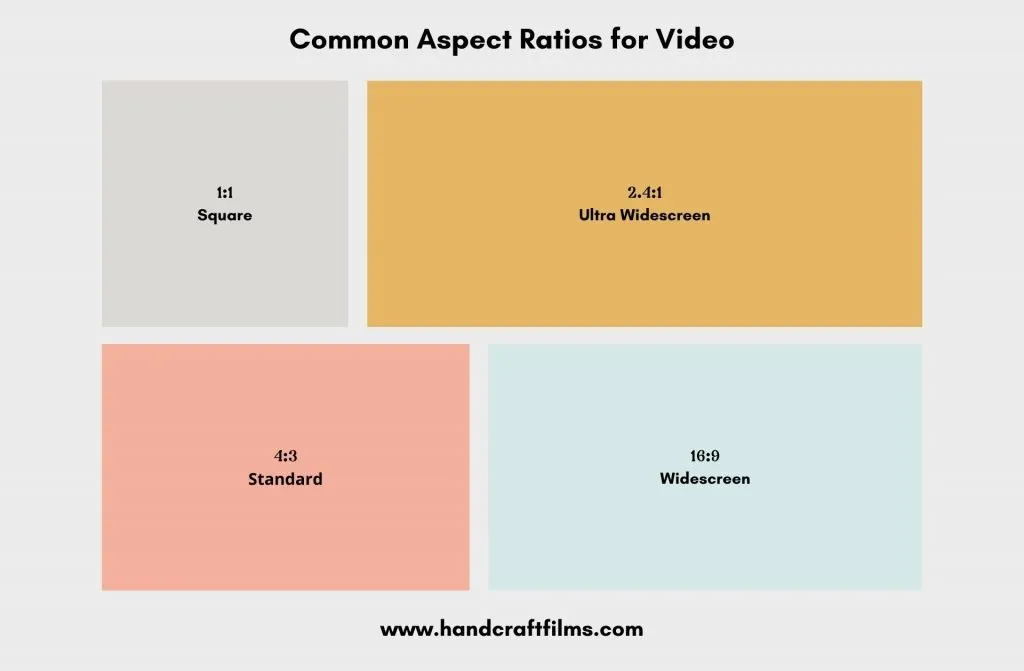
The numbers that make up an aspect ratio describe the width to height ratio of an image. For example, the most common aspect ratio is 16:9 or what’s also commonly referred to as a ‘widescreen’ aspect ratio.
This means that for every 16 units of width, there are 9 units of height. So, if you have an image that’s 16 units wide, it will be 9 units tall.
It doesn’t matter what unit you are using, whether it’s pixels or inches, the shape or ratio will remain the same.
This is an important distinction because it means that a certain aspect ratio can be universal, no matter the actual size of the medium.
How to Set the Aspect Ratio for a New Project
First, I’ll walk you through exactly how to set up your aspect ratio by creating a new sequence in Premiere Pro.
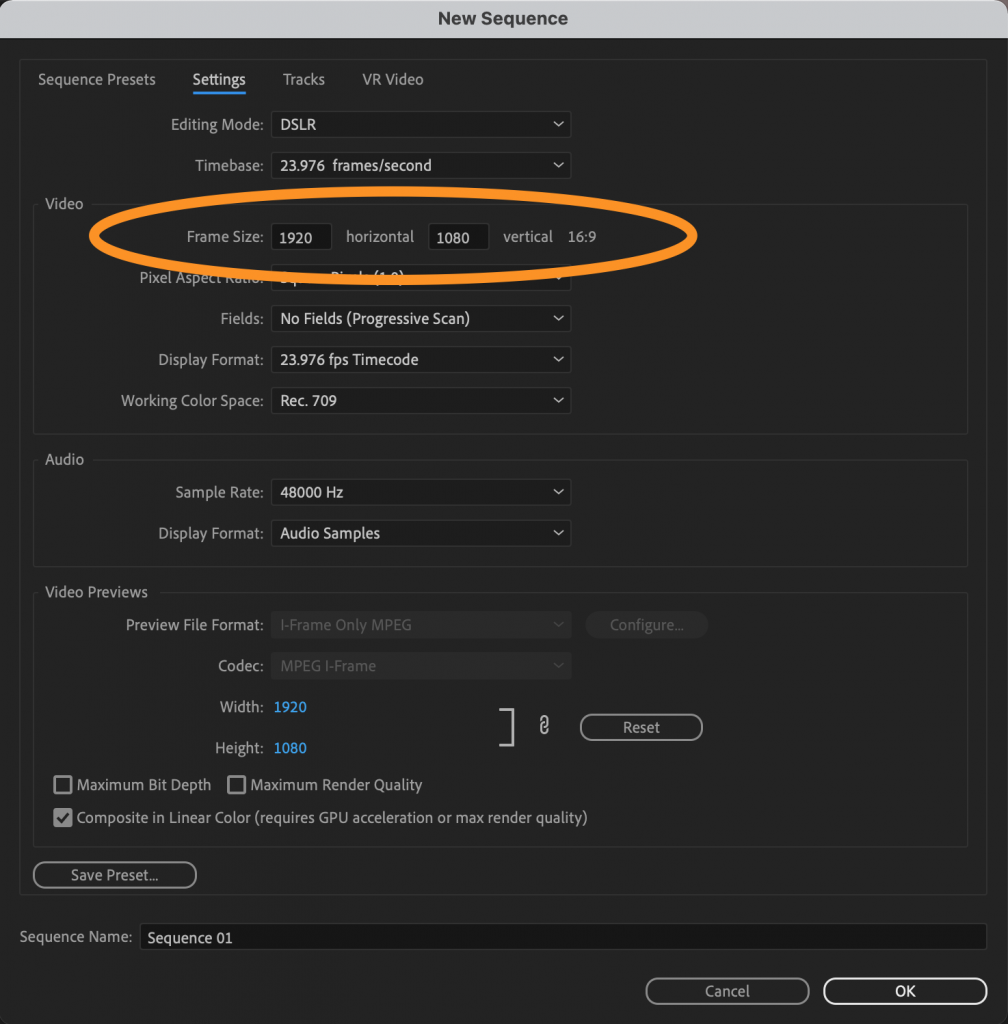
Step 1 – Create a New Sequence. Once you’ve opened Premiere Pro, navigate up to ‘File’ and select ‘New -> Sequence…’

Step 2 – Once your New Sequence window pops up, navigate over to the Settings tab and take a look at the Video Frame Size settings.
In this image you see that my project is set at 1920 pixels wide by 1080 pixels tall. Next to those dimensions you’ll see your current aspect ratio. In this case, 16:9.
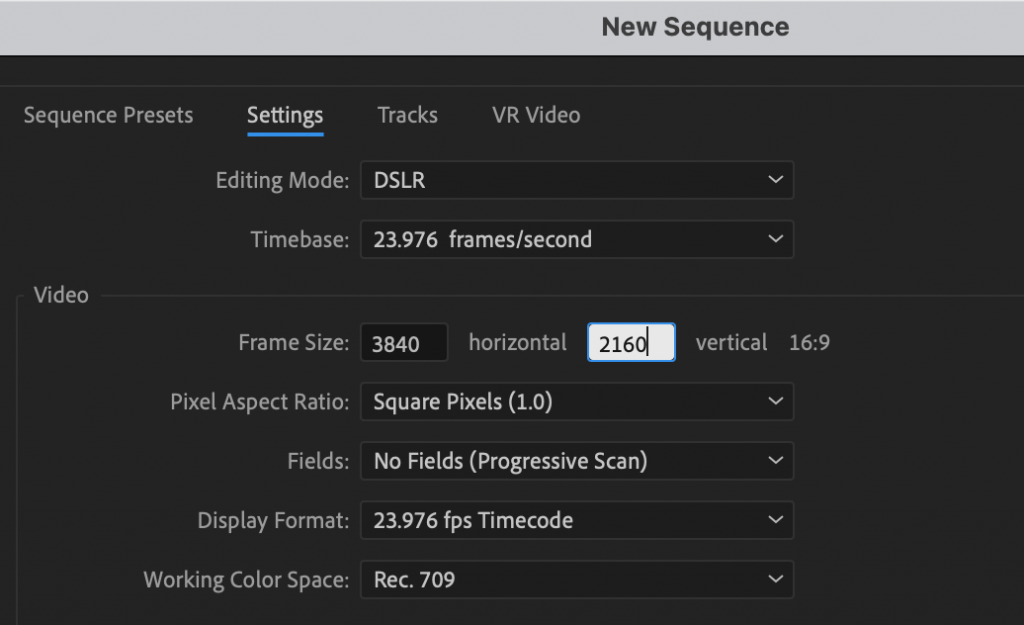
To adjust the Frame Size, you simply click in the box for each number and manually type in the pixels you’d like. Let’s set our Project for 4K. I’ll put my frame size at 3840 x 2160.
If you aren’t sure exactly what you should set your aspect ratio to, hang on just a minute. We’ll cover exactly where you should set it in just a moment.
Step 3 – Hit ‘Ok’ at the bottom of this window and your new sequence will automatically open with the correct aspect ratio set for you.
How to Change the Aspect Ratio of an Existing Sequence in Premiere Pro
To change the aspect ratio of an existing sequence, you’ll need to open up your Sequence Settings.
To do this, simply right click on your sequence in the Project panel and select ‘Sequence settings’.
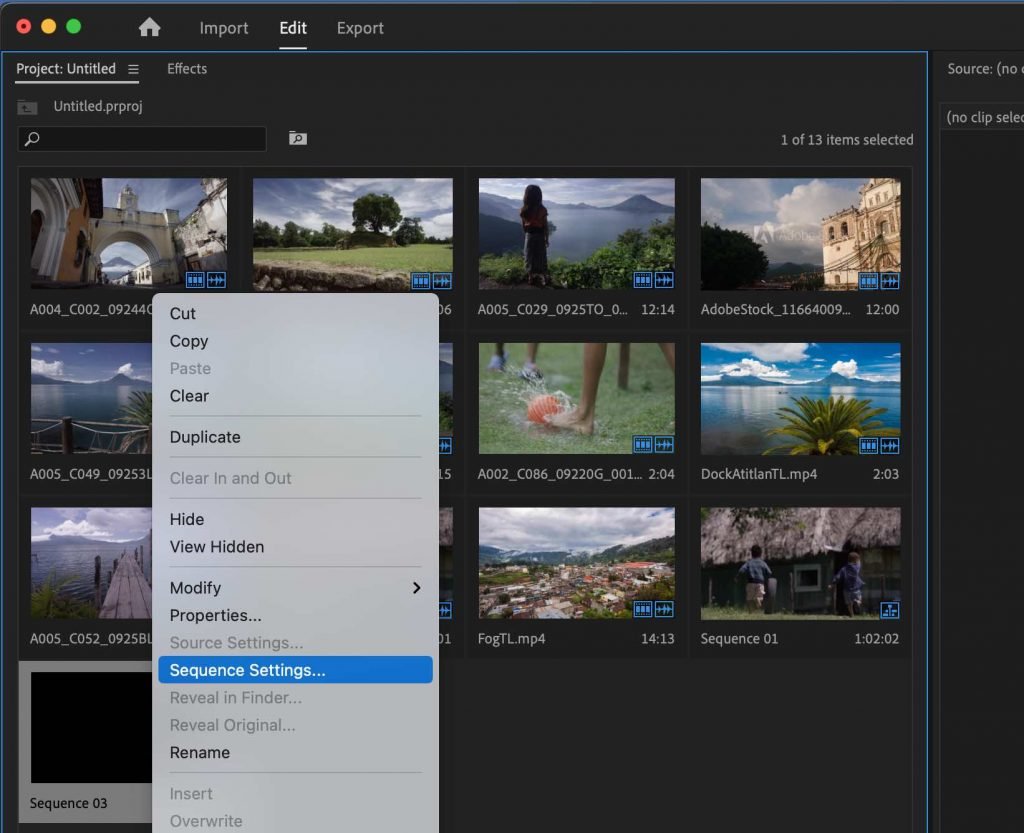
This will automatically open up your Sequence Settings window for you. Navigate over to the settings tab and take a look. Here you can adjust the video resolution to any number you want.
Once you’ve entered your desired resolution and aspect ratio, hit ok.
You may see the following warning pop up if you’ve already done some work in your timeline:
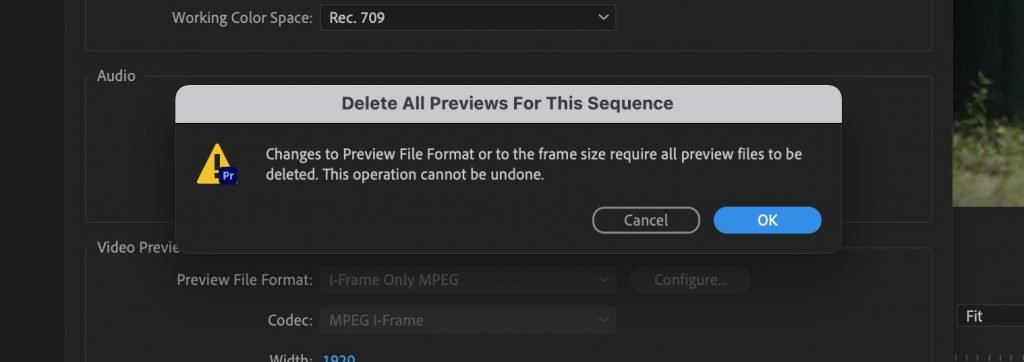
That’s ok, go ahead and click ‘Ok’.
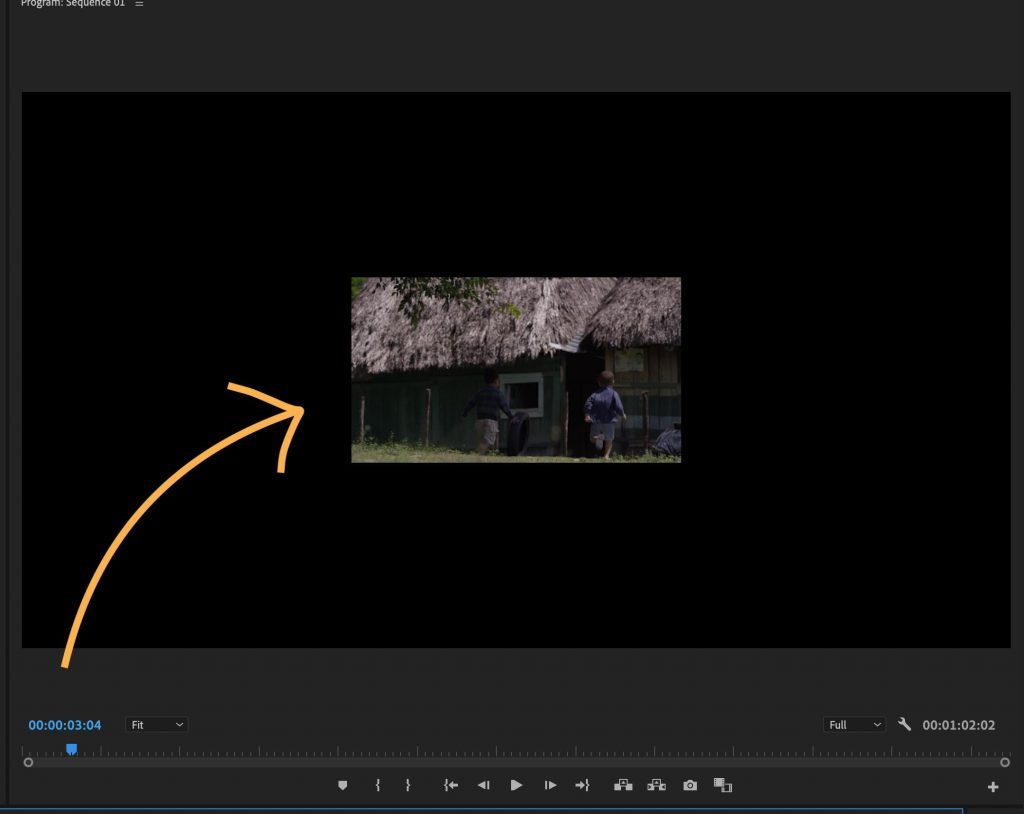
Now you may notice that your existing video doesn’t exactly fit into the new sequence settings you’ve created.
That’s because you’ve changed the aspect ratio of your project, but not the video itself.
To fix this, all you need to do is scale your video up or down accordingly. Here’s how to do it.
How to Make Your Video Footage Fit Into a New Aspect Ratio
If you change the aspect ratio of a project that you’ve already started working on, you may notice that the footage in your sequence isn’t fitting the playback window correctly.
Here’s how to change the size of all your existing video footage to match your new sequence settings.
Select one or more clips that you need to adjust in your timeline. Right click and select ‘Set to Frame Size‘.
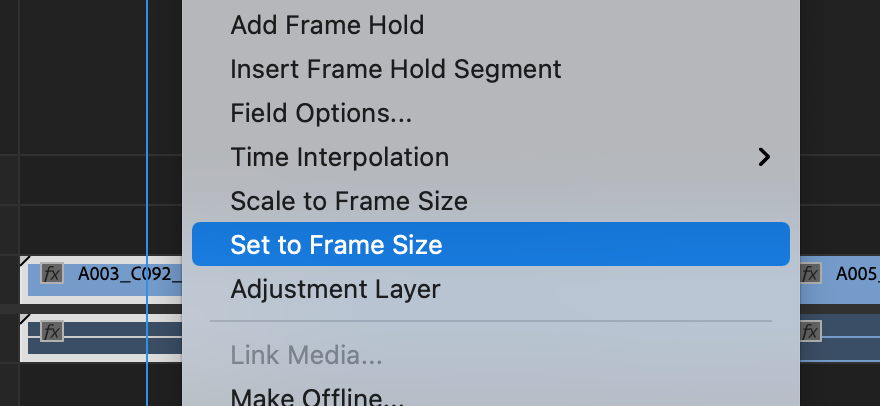
And that’s it! You’ve successfully changed the aspect ratio of your video footage.
Keep in mind that you can also use this method to scale down your video footage if you need to. Simply select all the clips you want to adjust, right click, and select ‘Set to Frame Size’.
It will also work if you select ‘Scale to Frame Size’. To learn the difference between these two settings, be sure to check out my post all about how to resize video clips in Premiere Pro.
How to Choose Which Aspect Ratio I Should Use?
Now that we’ve covered what an aspect ratio is and how to set the frame size for your project, you might be wondering which aspect ratio you should use.
The answer to this question really depends on a few factors. The first being what type of project you’re working on and where it will be shown.
Here are some common aspect ratios for social media videos.
What Aspect Ratio to Use for Youtube Videos?
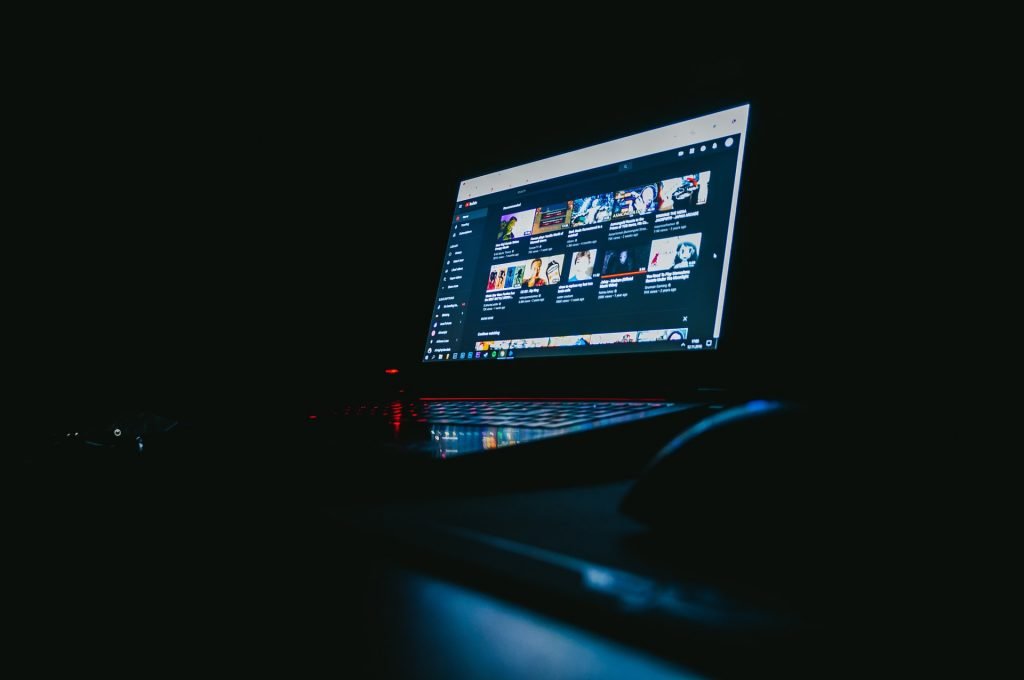
You should use a 16:9 aspect ratio for YouTube videos.
For 4k resolution, the exact size should be 3840x2160px.
For HD resolution, the exact size will be 1920x1080px.
See how the sizes can be different, but the aspect ratio remains the same? This allows you to enter the correct dimensions, no matter what size your original footage was captured with.
What Aspect Ratio to Use for Youtube Shorts?
This relatively new video feature includes short, vertical videos that can be up to 60 seconds in length. They are designed to be consumed on mobile devices, specifically phones.
You should use an aspect ratio of 9:16 for youtube shorts.
The recommended size is 2160×3840, but you could also use the following if your footage is lower resolution: 1440×2560, 1080×1920, 720×1280, 480×854, 360×640.
How Do I Choose What Size or Resolution to Use?
At this point, you may be wondering which resolution or size of footage to use for a certain aspect ratio.
There are a few things to consider when making this decision.
In most cases, you want to use the largest resolution or size possible. This is determined by what size your footage was shot on.
For example, if you’re working with 720p footage, you don’t want to use a 1080p sequence setting.
Trying to size your footage larger than it was originally intended will lower the quality of your final video. Instead, try to maintain around the same pixels or smaller than the footage was shot.
In some cases you may choose a smaller resolution simply to reduce the overall size of your final file or to enhance playback speed of the final video – on a blog or web page for example.
Let’s get back to some more examples of exact aspect ratios you may need for social media videos.
What Aspect Ratio to Use for Facebook Videos?
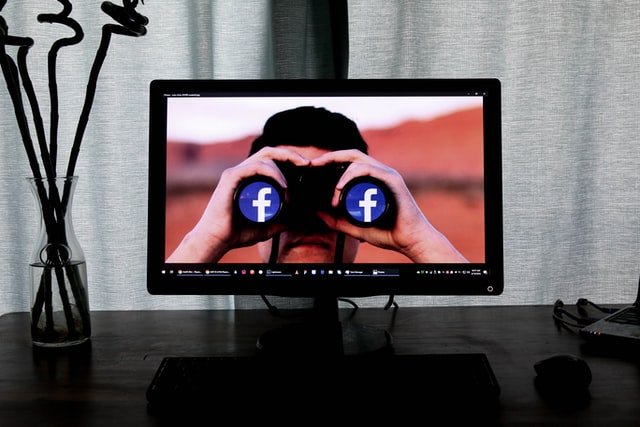
Facebook has many different options for videos and it all depends on what type of video you’d like to display.
Here’s a breakdown of the recommended aspect ratio and exact sizes for each type of Facebook video you’d like to share.
Video Size and Dimension for Facebook Shared Post
This is the most common type of video on Facebook, played in the feed along with other text and images. You can choose between two video orientations: landscape or portrait. Let’s take a look at the recommended settings for each.
Landscape Video Dimensions
Recommended Aspect Ratio: 16:9
Recommended Size/Resolution: 1280x720px
Portrait Video Dimensions
Recommended Aspect Ratio: 9:16
Recommended Size/Resolution: 720x1280px
Facebook Video Ads
These are similar to in-feed video posts, except sponsored. However, there are several options to choose from, depending on how you prefer your ad to be displayed.
Recommended Aspect Ratio: Horizontal – 16:9, Square – 1:1, Vertical – 4:5 or 2:3, Full Portrait – 9:16.
Recommended Size/Resolution: Depends on your desired aspect ratio, but at minimum 1080×1080.
Keep reading to figure out exactly what size to make your video based on a desired aspect ratio.
Facebook Carousel Video Ads
Recommended Aspect Ratio: 1:1
Recommended Size/Resolution: 1080×1080
Facebook 360 Videos
This option allows users to explore your video from all angles.
There are two options – monoscopic and steroscopic. The recommended settings are as follows.
Monoscopic Video
Recommended Aspect Ratio: 2:1
Recommended Size/Resolution: 5120x2560px
Stereoscopic Video
Recommended Aspect Ratio: 1:1
Recommended Size/Resolution: 5120x5120px
Video Size and Dimension for Facebook Stories
Recommended Aspect Ratio: 1.91 to 9:16 (colored gradient bars will be places above and below any videos under 9:16)
Recommended Size/Resolution: 1080×1080
How to Change Aspect Ratio in Premiere Pro for Instagram
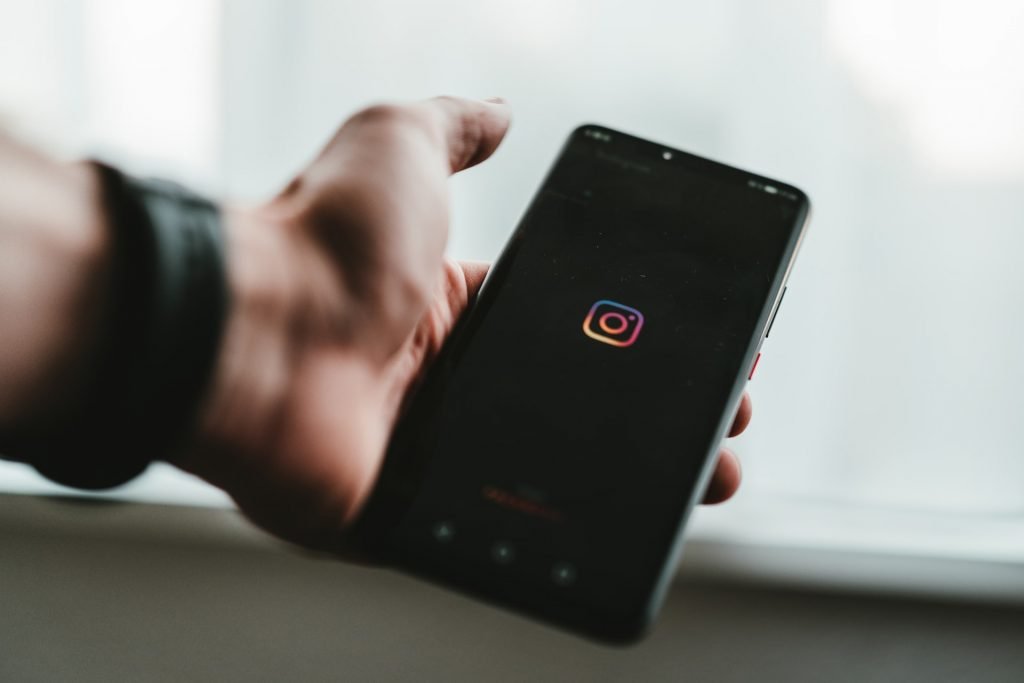
Remember, all you need to do to change your aspect ratio in Premiere Pro is go up to to ‘Sequence’ -> ‘Sequence Settings’ to adjust the exact pixel size and ratio of your sequence.
There are two types of videos you can share on Instagram – those in your feed and those in your stories. The settings will be a little different for each. Let’s start with in feed videos (Landscape, Square, and Vertical).
In Feed Instagram Videos (Ads and Organic)
Minimum resolution recommended for all formats: 1080×1080
Recommended Aspect Ratio: Landscape – 16:9, Square – 1:1, Vertical – 4:5
Instagram Carousel Video Ads
Recommended Resolution: 1080x1080px
Recommended Aspect Ratio: 1:1
Instagram Stories and Reels
Recommended Resolution: 1080x1920px
Recommended Aspect Ratio: 9:16
How to Change Aspect Ratio in Premiere Pro for Tiktok
The recommended aspect ratio for TikTok is 16:09, but you can also choose to use a square (01:01) resolution. The recommended size/resolution is as follows.
TikTok Feed Organic Video Dimensions
Recommended Aspect Ratio: 9:16 (fills a cell phone screen)
Recommended Size/Resolution: 1080×1920
TikTok Feed Video Dimensions
There are a few different options for videos in the feed, here are some guidelines.
Recommended Resolutions: at least 540×960, 640×640, or 960×540
Recommended Aspect Ratios: 9:16, 1:1, or 16:9 (respectively)
How to Use Auto Reframe to Change Multiple Aspect Ratios in Premiere Pro
There is an awesome feature in Premiere Pro that will automatically reframe your sequence to allow you to choose multiple aspect ratios for various uses without you manually changing the entire sequence each time.
This is especially helpful for quickly reformatting a project for different social media platforms.
Let’s take a look at how it’s done.
Step 1 – Navigate up to Sequence -> Auto Reframe Sequence
You’ll now see a dialogue box with several options.
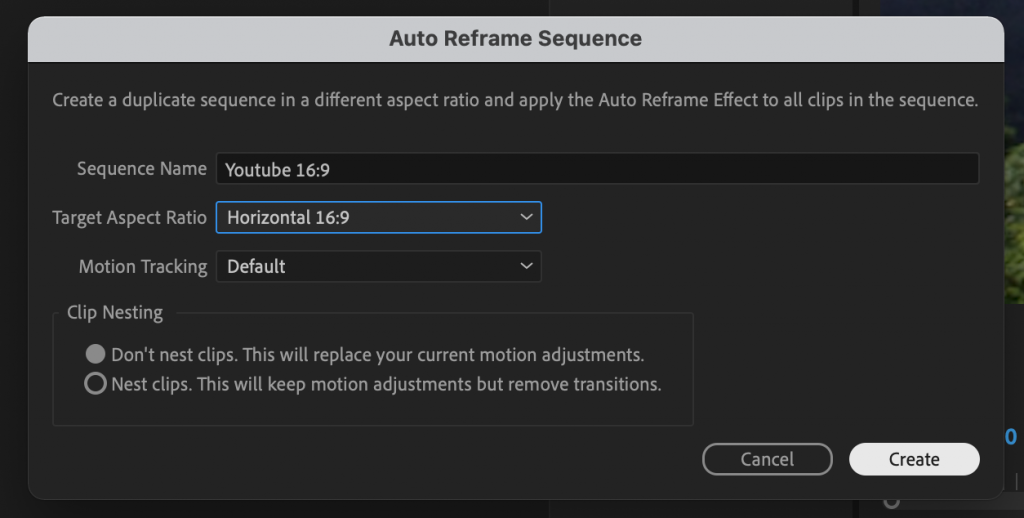
Step 2 – Rename the sequence to match the desired export (‘Youtube 16:9’, for example)
Step 3 – Choose the desired aspect ratio for your video. You can also choose custom to enter your own.
Step 4 – Clip Nesting: To nest or not to nest?
Auto reframe relies on keyframes to keep your subject in frame as you move it. If you have any keyframes on your clips, select Nest Clips or auto reframe will replace them.
However, if you do nest your clips it will keep any adjustments you’ve made but it will break any transitions you’ve applied in between clips.
Step 5 – Click ‘Create’. You will now be able to review and change anything needed in your new sequence.
As you can see, there are a few different ways to change your aspect ratio in Premiere Pro. The most important thing is to make sure you understand the requirements of the platform you’re exporting for and adjust your settings accordingly.
That’s it for this quick tutorial on how to change aspect ratios in Premiere Pro. If you have any questions, feel free to leave a comment below. Happy editing!