Splitting a clip in Premiere Pro is one of the most basic, yet important tools in video editing.
You can easily split a clip in Premiere Pro by selecting the Razor Blade tool (keyboard shortcut ‘C’) on the toolbar to the left-hand side of your sequence window. With the Razor Blade Tool selected, click on any area of your timeline to split your clip into two.
In this short guide, I’ll walk you through this process in step by step detail, as well as share some handy shortcuts that will save you time and have you editing like a pro.
If you haven’t already, go ahead and import your footage into Premiere Pro. Here’s a step-by-step if you need it first – Quick & Easy: How to Import Videos in Premiere Pro for Beginners.
1 – Split a Clip Using the Razor Blade Tool
The most straightforward way to create a cut in your clips is by using the razor blade tool. You’ll find it on the left hand side of your editing sequence.
Find it and select the tool that looks like a razor blade.
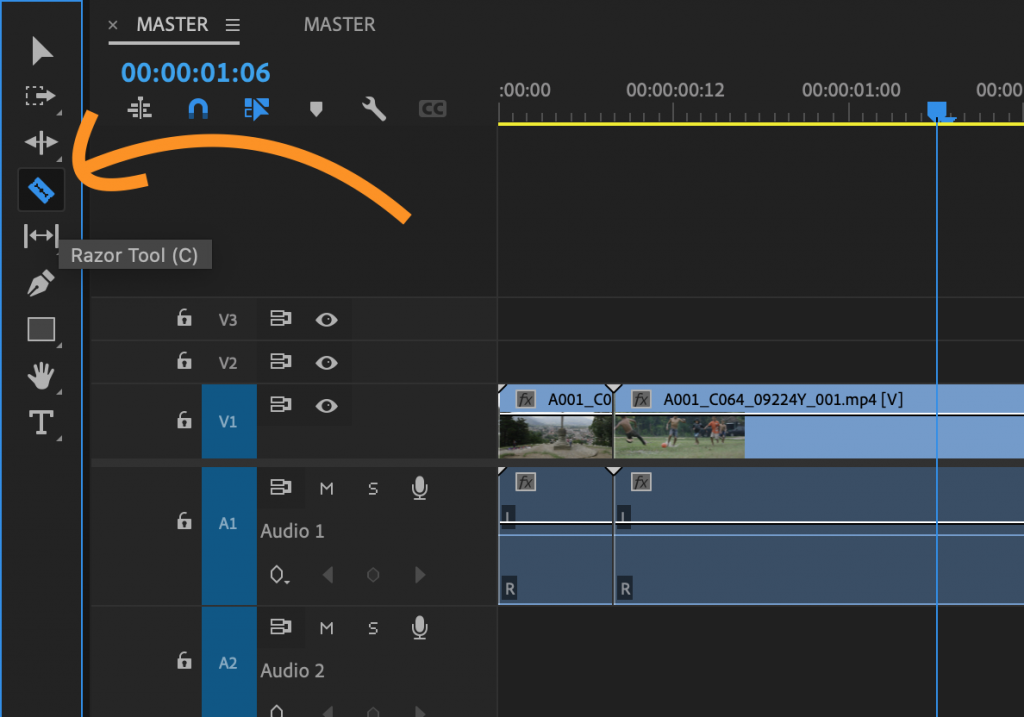
You can also use the keyboard shortcut ‘C’ to quickly select this tool.
Hover your mouse over the spot where you’d like to make a split and click to cut the clip in that spot.

You now have two clips from the same footage, separated by a cut. This will allow you to manipulate each clip independently as you wish.
Hit the keyboard shortcut ‘V’ to get your mouse back to the general selection tool to continue editing.
That’s it! Super straightforward and easy.
Keep on reading for some more in-depth tips on how to trim and cut your clips more efficiently.
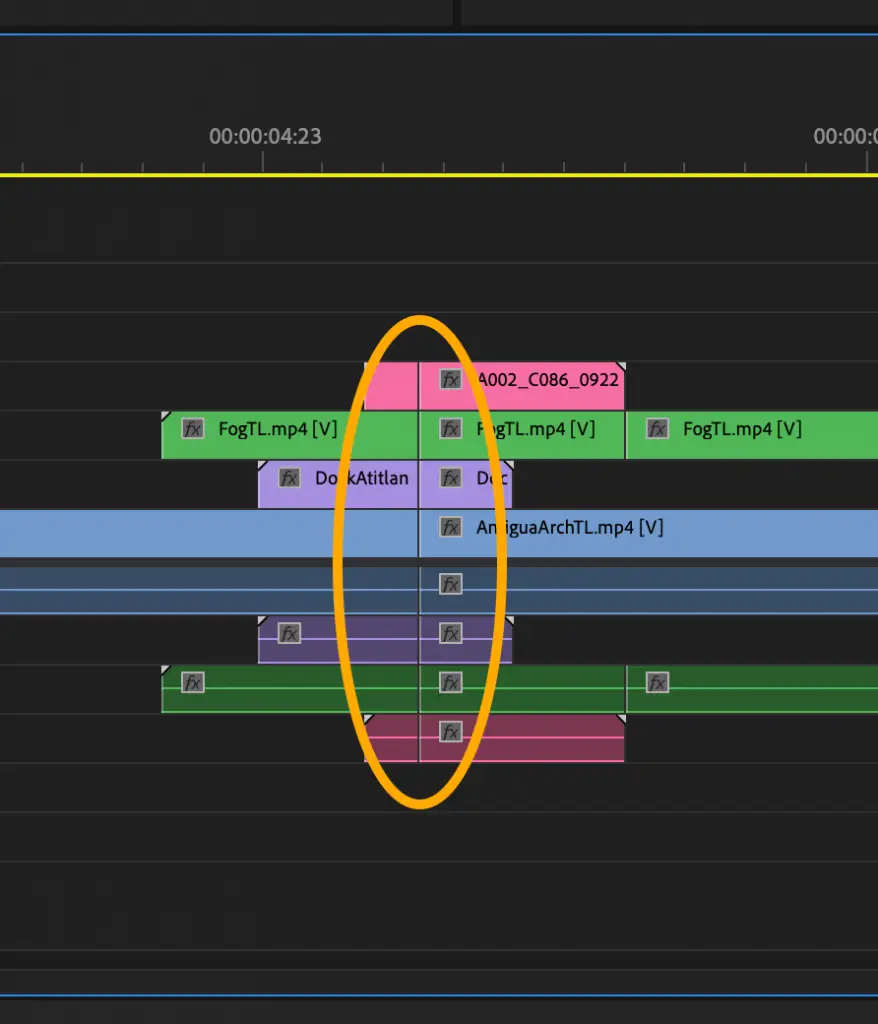
2 – How to Split Multiple Clips At One Time
If you have multiple layers of clips and want a quicker way to cut them all at once, here’s how you do it.
You could just manually go down the line, using your razor tool. But there’s a much quicker way, especially if you intend to make a seamless cut of all your media at the same time.
To split multiple clips at one time, simply hold down the shift key while your razor tool is selected. Click the mouse while holding shift and everything in line with your cursor will be cut at the same time.
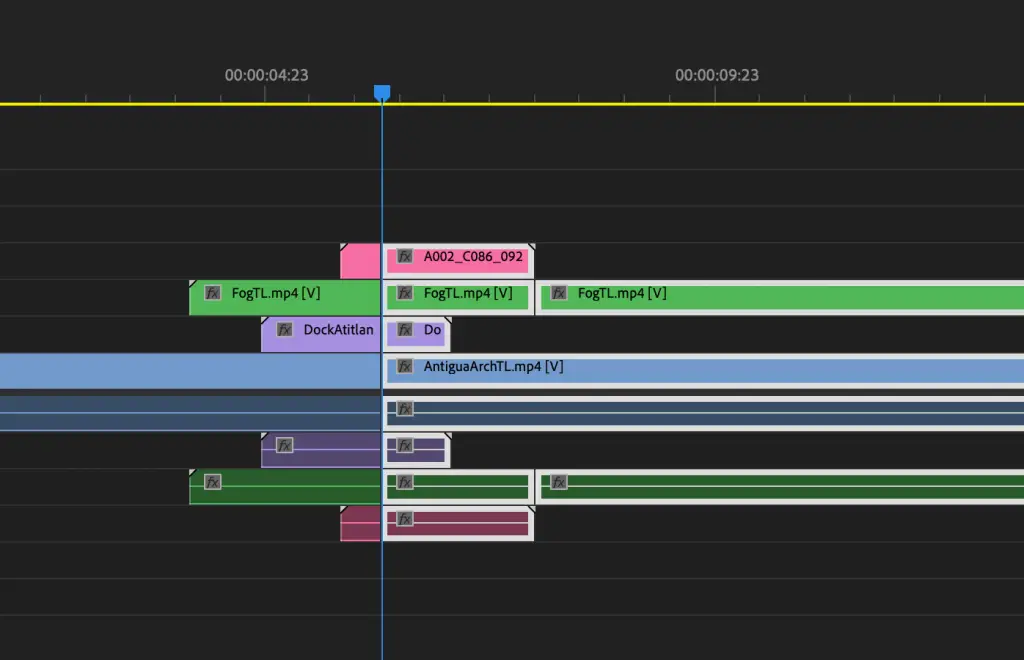
How to Select Everything to the Right of Your Cut
Here’s a quick tip for how to select everything on one side of your cut, so you can move it all around quickly.
Hit keyboard shortcut ‘A’, select the side you’d like to move (keep clicking to add any missed clips), and now all your media will be selected and ready to move.
3 – Split Clips Using Add Edit
Here’s another method for splitting clips in Premiere Pro. It’s a bit more efficient, but also a step more advanced.
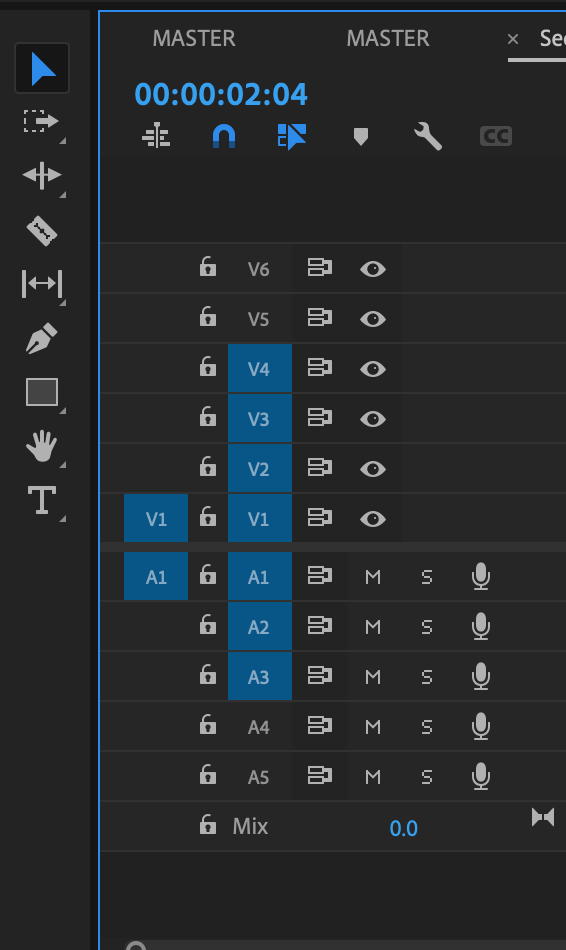
With your mouse over the area where you’d like to make a cut, highlight the clip or clips you’d like to cut, now hit the keyboard shortcut ‘Shift Command K’ (‘Shift Control K’ for PC users).
You can use this same keyboard shortcut to cut multiple layers at once. This is where this tool becomes super efficient.
The key is you need to make sure that you’ve toggled on/off the correct layers that you’d like to cut. You can confirm this by seeing which are highlighted blue on the left-hand side of your sequence timeline.
Click on any V Layer to toggle it on or off. You can do the same with your audio layers, in case you want to make cuts to your video layers but not your audio.
(Note: be very careful that you don’t get anything out of sync here, like synced interview audio, etc.)
4 – How to Merge Clips
Yes, you can absolutely re-join clips back together after they’ve been split.
The easiest way to merge previously cut clips back together is to hit ‘delete’ on your keyboard while the cut is selected (using the ‘v’ selection tool).
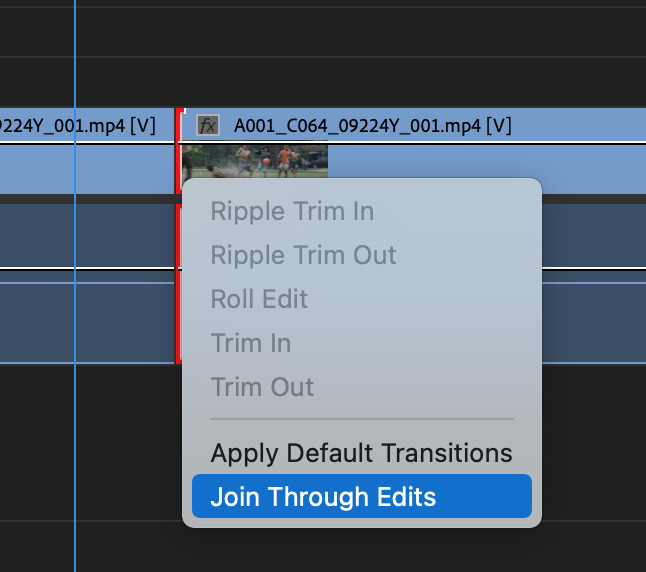
You can also simply right-click on the cut itself and choose ‘Join Through Edits’.
5 – How to Delete Part of a Clip
Once you’ve made your cuts, what’s the easiest way to delete any portion of the clip that you don’t want any more?
The simplest way to delete part of your clip is to simply the select the unwanted portion and hit delete.
But what do you do with the gap that’s left?
Here’s where a few handy tools can really help you get rid of that empty space quickly and easily, while also not disturbing anything else in your edit.
How to Delete An Empty Gap in Premiere Pro
If there’s still a portion of your clip that you’d like to delete and fill the gap, simply hold down ‘shift delete’ to delete the media and any empty space left.
Premiere Pro will sometimes make this step tricky if you have multiple layers. It doesn’t want you to mess up any unaffected audio layers below.
If you’re having trouble, make sure the layers you want to select are toggled and that any audio layers that you don’t want to delete are locked.
If you have an empty space in your timeline that you’d like to fill, you can select that empty space and hit delete and the empty space will be filled by sliding everything that was to the right of your timeline to where you made the previous cut.
Note: be careful in all of these steps, because it’s easy to get your audio/video layers out of sync if you aren’t paying attention. Make sure after sliding anything around that you haven’t disturbed any previous edits in your timeline.
How to Delete Everything to the Left or Right of a Cut
Let’s say you’d like to completely get rid of everything to one side of a cut, here’s the quickest way.
This step will make a cut, plus trim everything to a certain side of that edit all at one time, so if you’ve already made your cuts, then try this next time as you’re making those cuts.
With your playhead on top of the spot where you’d like to make your cut, hit the keyboard shortcut ‘Q’. Now everything to the left of your playhead will be deleted, AND your timeline will automatically fill the in the gap of the cut.
You can accomplish the same task if you want to cut and trim everything to the RIGHT of your playhead. Simply hit keyboard shortcut ‘W’ and everything to the right of your playhead will be trimmed.
6 – How to Trim the Edges of a Clip
Here’s the quickest way possible to trim the edges of your clip in Premiere Pro.
Place your playhead on the left side of your clip where you’d like to make the trim, now hit ‘Q’. Not only will it trim the edge of your clip, it will also slide the remaining clip to remove any empty space in your edit.
Now place your playhead on the right side of your clip where you’d like to make a trim and hit ‘W’. Anything to the right of your playhead will now be deleted.
You can also click and drag the edges to eliminate any unwanted areas of your clip.
7 – How to Delete the Space Between Two Clips
As an editor, you’ll be deleting the space between clips ALOT.
There are lots of ways to do this, and some just depend on the task at hand.
Here’s the easiest way to get rid of that unwanted space between two clips: simply select the area you wish to delete with your selection tool (keyboard shortcut ‘v’). Once the area is selected hit ‘delete’.
Conclusions
It’s important to explore some of the incredible tools within Premiere Pro to find what works for you. Eventually you’ll get set in your ways and discover your own editing personality.
At that point many of these shortcuts will become second-nature and you’ll be cruising through your edits.
I hope you enjoyed learning more of the basics on how to edit video in Premiere Pro. Be sure to check out more tutorials on video editing in our blog!
Here’s a great place to start if you want a quick intro to video editing: Learn How To Edit Videos With Premiere Pro For Beginners.