The world of filmmaking has come a long way. It used to require expensive equipment, years of education, and a big time commitment – at least if you wanted to make videos that didn’t have that 1980’s America’s Funniest Home Video kind of feel to them.
With the advent of so much technology over the years, there are now some amazingly capable cameras that won’t break the budget. Along with easy access to affordable editing software that allows us to make beautiful, non-cheesy, even cinematic level videos without a ton of effort.
I want to let you in on a secret… taking great videos of your kids really isn’t that hard. With a little practice and a few rules of thumb, you can really put together some amazing memories that you’ll be forever grateful to have.
By the end of this post, I hope to show you how easy it actually is to take great videos of your kids.
1 | Focus on the Story
Many of us get into a habit of taking random video clips of our kids without putting much thought into it. We pull out our phone or our camera and we start shooting away. But then we are at a loss for what to do with all the videos that we’ve captured. How do we edit them together in a meaningful way?
Or perhaps you want to take great videos of your kids, but you simply don’t even know where to start.
The best place to start is simply putting a little thought around exactly what kind of story you want your film to tell. It can be as simple as an evening dinner, a funny bath tub routine, or a baby learning to crawl. Even in each of those small scenarios, there is a story to be told.
Let’s use an example. Every year my kids get together with their cousins for a tradition of baking Christmas cookies. It’s just our kids baking cookies in the kitchen, but with a little thought behind it we can easily turn those every day type of moments (and a bunch of random clips) into a cinematic keepsake that really tells a story and reminds us of what we loved about that tradition each year.
Whether you’re shooting a vacation, a trip to the playground, or simply around the house moments, your videos will be astronomically better with a little forethought before you start shooting.
Let’s walk through a few ideas you should think through before you begin shooting. These will help build and frame your story.
What is the purpose of your story?
This could be a simple sentence: to remember the tradition of baking cookies with cousins. Or to capture all the memories from a family vacation. Simply writing down or thinking about the purpose behind the video you’d like to create will be the first step in creating an organized and cohesive idea for your film.
Establishing Shots
An establishing shot is very much what is sounds like – it’s a visual shot that introduces to the audience where we are and what we are doing in the video. In the cookie film above, the child putting on an apron works as an establishing shot. It tells the audience a number of things – we are getting ready to cook, we are in a home, and the child is excited about it.
An establishing shot can also act as a transition in the middle of a video. It works well when you change locations or scenes so that your audience isn’t confused and your film isn’t jarring when all of a sudden you are in a different place in the video.
Each time that you make a change like this, think through a simple shot or two that can work as your establishing shot. It can be very simple – riding in a car (if you are changing locations), kids waking up the next morning (to start a new day of vacation), opening a door (changing rooms in a house).
Introduce and Develop Characters
Throughout your film you want to focus on trying to capture the personalities of your kids. Be ready to capture all the funny expressions and phrases that you know they’ll say. I highly recommend this inexpensive and portable microphone to always have on hand. Here’s my favorite one. Just let it roll so you don’t miss any moments.
B-Roll Is Your Best Friend
What is b roll you ask? Only one of the most important things you’ll ever need, so let’s make sure you have a good understanding of it. Plus when you say this to your friends you’ll sound legit.
It’s called ‘b roll’ because it used to be the secondary footage that was captured to fill in holes or create transitions when editing. As opposed to ‘a roll’ which would be something like the footage from a sit down video interview, for example.
We’ll use that example to explain further.
Let’s say we’ve shot an interview of someone explaining how much they love the outdoors. Instead of seeing a talking head the entire time they are speaking, we want to see shots of the mountains when they are talking about how much they love to hike and shots of them playing with their kids when they say they like to spend vacations with their family.
Those visual shots that you see while they are talking are called b roll.
2 | Prompt, Don’t Pose
If you want your videos to feel authentic then they need to actually be authentic.
This means letting your kids be themselves and learning how to capture their personalities in meaningful ways. It means capturing your two year old little boy stomping around in the mud after a rain storm, instead of instructing him to smile perfectly in a clean shirt. I know that’s an exaggeration, but you get what I’m saying.
This is something that I practice every single time I’m on shoot with a family for a lifestyle photo session. Especially families with kids between the ages of 1 and 4. Typically, I grab a handful of portraits right when the family shows up, because I already know that 99 out of 100 times, the small child will no longer be happy being held within 15 minutes of starting the shoot.
I always give the parents a heads up ahead time that toddlers very rarely will sit and pose with a smile on their face. However, they laugh when tickled, or thrown in the air, or chased in a field. And these action shots are generally best and most authentic of them all. Because the whole family is engaged and they really are having fun.
That’s what I mean when I say prompt, don’t pose. If you are trying to get your kids to sit and smile for the camera – don’t just tell them to look at you and say cheese. Because even if they do, it isn’t going to look great. You need to create a scenario where they are actually having fun and smiling.
Make it a game of some kind for them. The ideas are endless and it really depends on the scenario you’re in. One that always works for me is if I taunt my toddler and tell her ‘don’t you smile at me!’ Let loose yourself and let your kids know that you want them to do the same. Play ring around the rosy. Let them giggle and fall down. That’s when you snap away.
It also helps if you just start to film them more often. They will soon forget that the camera is even there. This applies to spouses and extended family members as well 🙂
3 | Formulate a Shot List
This sort of goes back to point number one about telling a story with your videos, but in a little more detail. And granted, I totally understand that not every situation warrants a detailed shot list. To be honest, I don’t often create a shot list for many of our family films.
At least not on paper. You better believe I have a running shot list going in my head at all times. When I shoot a fresh 48 hospital video for a family with a newborn, I have a detailed shot list that I follow each and every time.
Your videos won’t be cookie cutter, they will in fact be more creative because you’ll be organized and on top of getting what you need, which gives you head space to be able to think through new creative ways to get additional fun shots.
Here’s a rough example of what a shot list might look like for the first day of a family vacation:
Day 1 – Travel Day
- Establishing Shots: packing bags (close up, wide shot), loading bags into car (one wide shot, one close up), kids getting loaded into car, car drives away (wide shot)
- On the road: kids playing in back seat, shots of scenery out the window, anything spontaneous that happens along the way
- Transition Establishing Shots: arriving at our vacation destination, kids getting out of car and being excited (one stationary, one moving shot), exterior shots around the vacation home (b roll: fall leaves, pretty view, exterior of house)
You don’t necessarily have to write it down (although I think you should, at least while you’re still getting the hang of things) but at least think it through before you begin shooting.
It only takes a few minutes and just puts some thought and intention behind what you’re doing. This along will dramatically improve your video storytelling ability.
4 | Shoot a Variety of Angles
Let’s talk a little about getting creative. I feel like when we pull out our cameras (and especially our phones) we tend to just hold our hands out and shoot. There are so many more interesting ways to get fun videos simply by adding some variety to the angles you are shooting.
I have a rule where I try to get at least three angles for each and every shot. It doesn’t always work in real life, but make an attempt and you’ll usually get more than you need anyway. What I mean is – let’s say I’m filming my little girl doing something funny at the dinner table.
I’ll get one medium shot looking straight at her face. Next I will move to the side of her and get a shot, maybe a little wider (further away). And last I’ll try to do something more creative – like a shot directly above her head looking down or a super close up of her hands.
When you get into the editing phase of your video, you’ll quickly see why having so many angles is helpful to putting your story together.
Not only does it make for a more visually interesting video, it also allows you as the editor many more options for which shots work the best, which ones cut together seamlessly, and it avoids jump cuts.
Here’s a short example I made for a previous post all about how to tell a story using a variety of camera angles. It shows a simple evening routine (bath time) and how you can make an interesting little story out of something so mundane simply by using a variety of camera angles.
This post does contain Amazon product recommendations. As an Amazon associate, I receive compensation for qualifying purchases, however any commission that I earn comes at no cost to you.
5 | Best Cameras for Shooting Family Videos
If you’re just getting started, you may not be ready to spend a ton of money of equipment. I completely understand, which is why I wanted to share a few recommendations for entry level gear that won’t break the bank. And by the way, it’s totally fine to just use your iPhone when getting started as well.
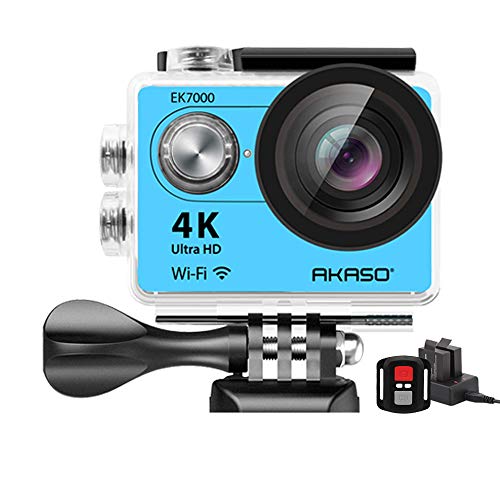
1 – Akaso 4K Camera – Similar to a GoPro, but much more affordable. This little camera get excellent reviews, plus it shoots in 4K. This would be a great option for active families looking for something very portable and affordable.
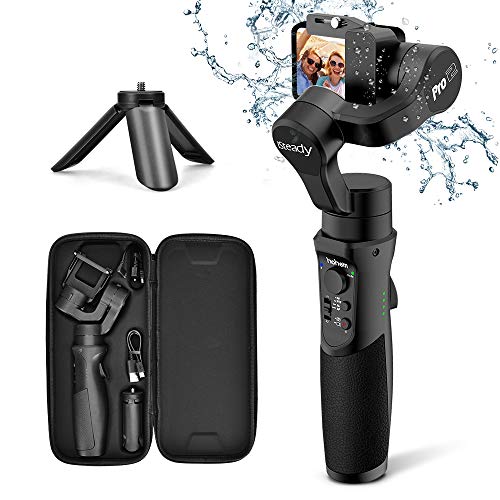
2 – Hohem iSteady Gimbal – Meant to accompany a GoPro or Akaso type camera like pictured above, this little gimbal will give your footage nice smooth and steady shots for a more cinematic feel, especially if you are shooting a lot of action or on the move shots.
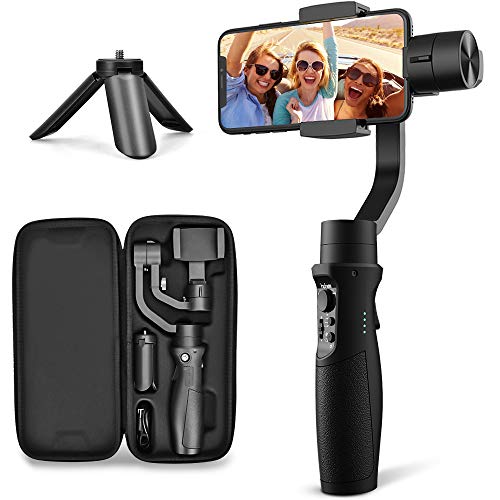
3 – Hohem Gimbal for iPhones – same product as above, but it fits iPhones. If you had to choose one accessory to up your video game when shooting on a smartphone, this would definitely be it. Especially for such a small price.
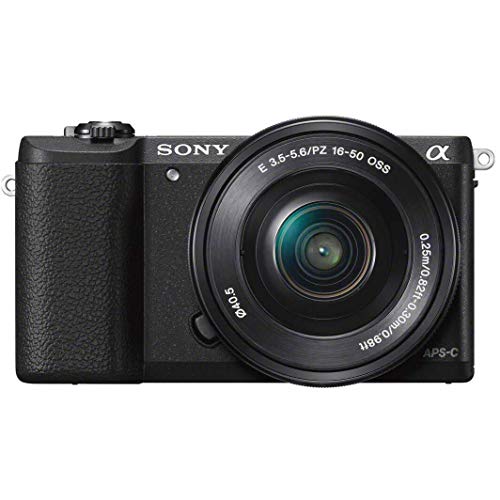
4 – Sony a5100 – any of the Sony A Series are going to be good options for the entry level filmmaker. They perform well in low light situations, most have touch screens and follow focus, as well as great quality footage. This particular model is very affordable and a great place to start.
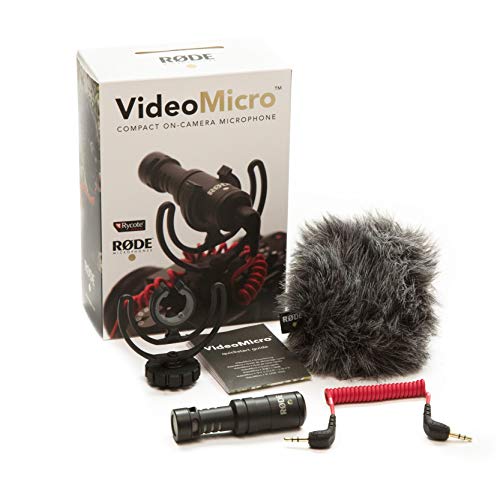
5 – Rode VideoMicro Compact On-Camera Microphone – This tiny little microphone is a beast. It picks up great quality audio and fits discretely to the top of a small camera or even an iPhone. I highly recommend this fun little accessory, especially for the price.
6 | Learn the Art of Video Editing
It won’t matter how great the videos you’ve shot are if you aren’t able to put them together in a meaningful way to share with the world.
Video editing is simply the process of taking the footage that you’ve shot and turning it into a cohesive story. It involves using computer software to make cuts, rearrange the order of your clips, adjust the timing, make choices about what to keep and what not to keep, fix the exposure and color of your clips, make sure the audio sounds good and aligns correctly, add music soundtracks and text, as well as a few transitions between scenes.
Weaving a visual story together is perhaps my all time favorite hobby and has been since I was a kid. I encourage you wholeheartedly to explore the many amazing things you can create from your videos during this editing stage.
I would love for you to join me and a handful of other beginner filmmakers in my online editing course. Within the course you’ll have access to behind the scenes videos of me editing films from start to finish, not to mention a full video course explaining exactly how to edit a film from A-Z. For a limited time I am offering this class for free, so go ahead and claim your spot!
What’s the best editing software for family videos?
There are a number of platforms out there that you can use to edit your videos. In my humble opinion the very best out there is Adobe Premiere. Like many of Adobe’s products, it’s an intuitive and easy to learn program.
You’ll have the most control over your videos using a program like Premiere over a more entry level program like iMovie or any other free program. To me, having complete control over my final films is important and it’s worth paying a small fee to use a great program and make my life easier. You can also download and try Premiere for 7 days free.
7 | Have Fun and Practice, Practice, Practice!
I truly hope this guide has helped give you some ideas of how to get started with making great films of your family. If it has, please let me know in the comments below.
My last tip is simply to have fun learning and shooting more with your family. Not only will you grow closer in the process, but your videos will naturally improve the more you practice and experiment with new and better ideas. I would LOVE to see what you are creating, so please share your videos with me!
Happy shooting!
-Beth
Share on Pinterest!

This post is immensely useful – thanks for the many great tips!