Today’s quick lesson will walk you through exactly how to control the speed of your clips as you play them back in Premiere Pro.
If you’ve ever scrubbed through hours upon hours of video footage, picking out small useable sound bites here and there, you’ll understand how much time this knowledge can save you.
You’ll learn the default playback settings, quick ways to alter the playback speed as you edit, as well as some solutions to common problems you may encounter.
If you haven’t yet, definitely check out all of our beginner Premiere Pro tutorials to learn more about the art of video editing.
1 | Default Playback Speed in Premiere Pro
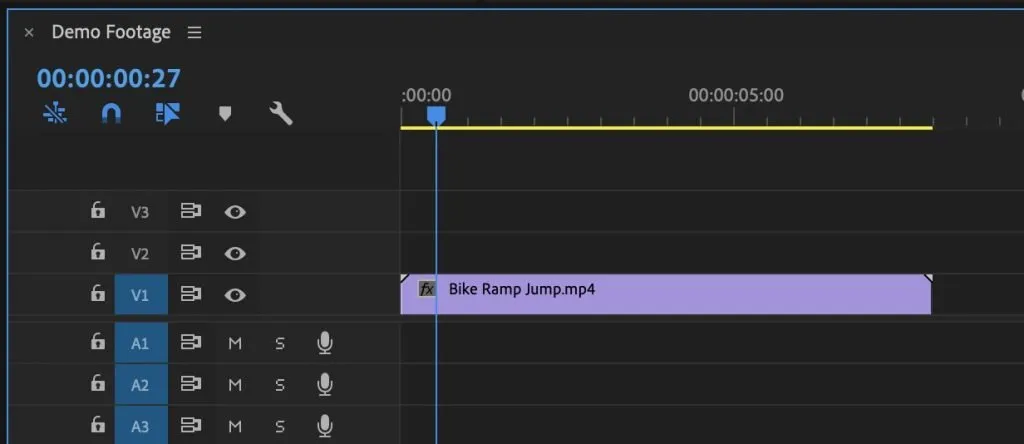
When you begin to edit a new project in premiere pro, you’ll start by dragging your clips into a new timeline. This will create what’s called a sequence, which is where your video edits will take place.
When you hit spacebar, your video will begin to playback in the preview window.
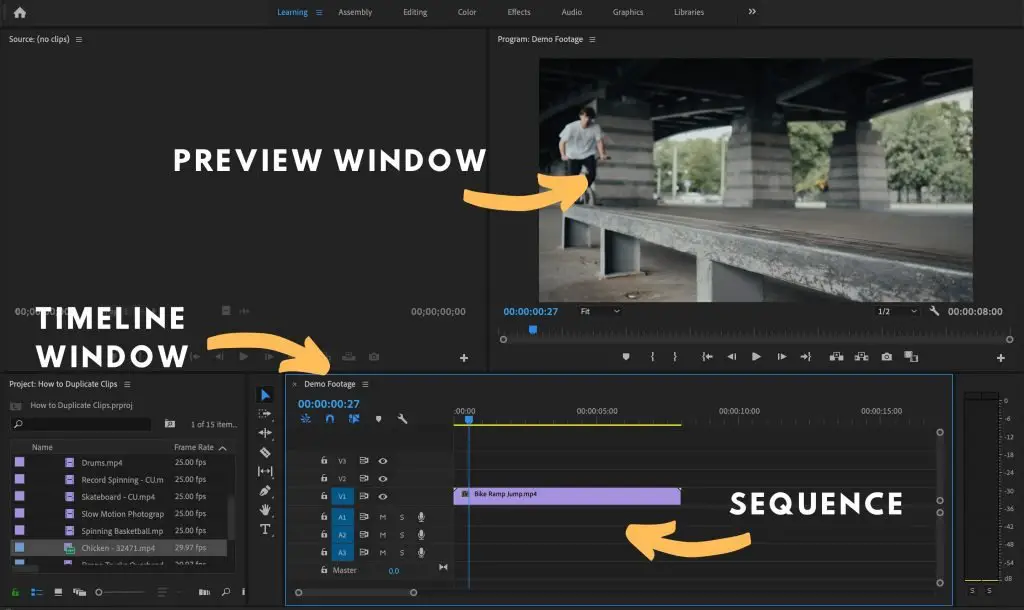
By default, when you hit spacebar, the video preview will playback in real time. In other words, the playback will match the frame rate that you’ve set in your sequence settings. In most cases, this will be 24 fps or 30 fps.
In addition, there are some very handy keyboard shortcuts that will allow you to control the playback speed of your video in real time as you edit.
2 | How to Fast Forward or Speed Up Playback
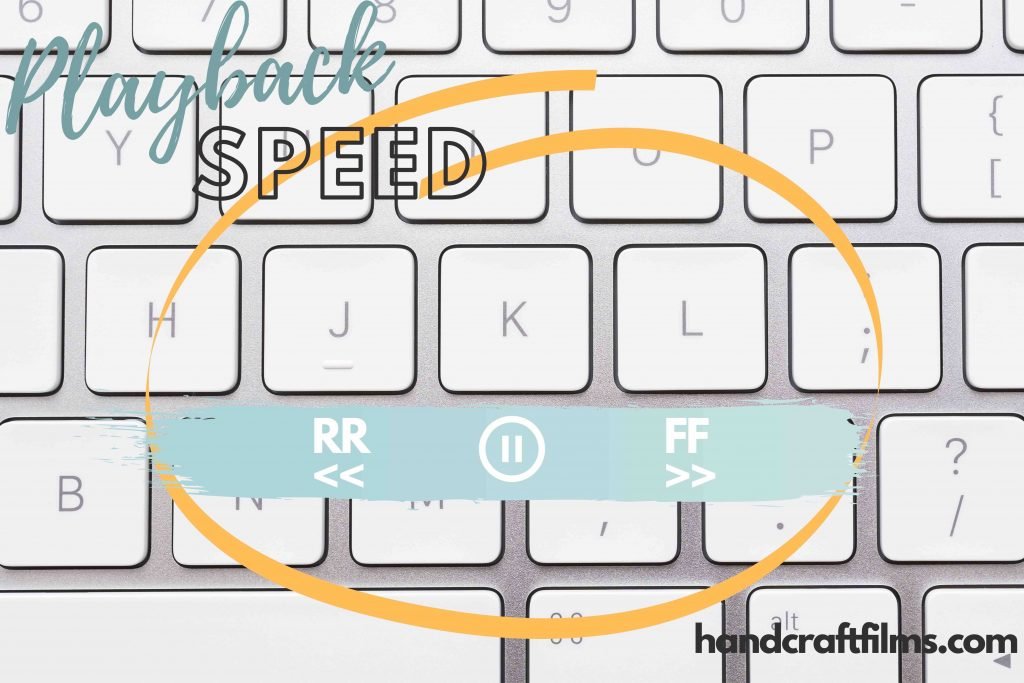
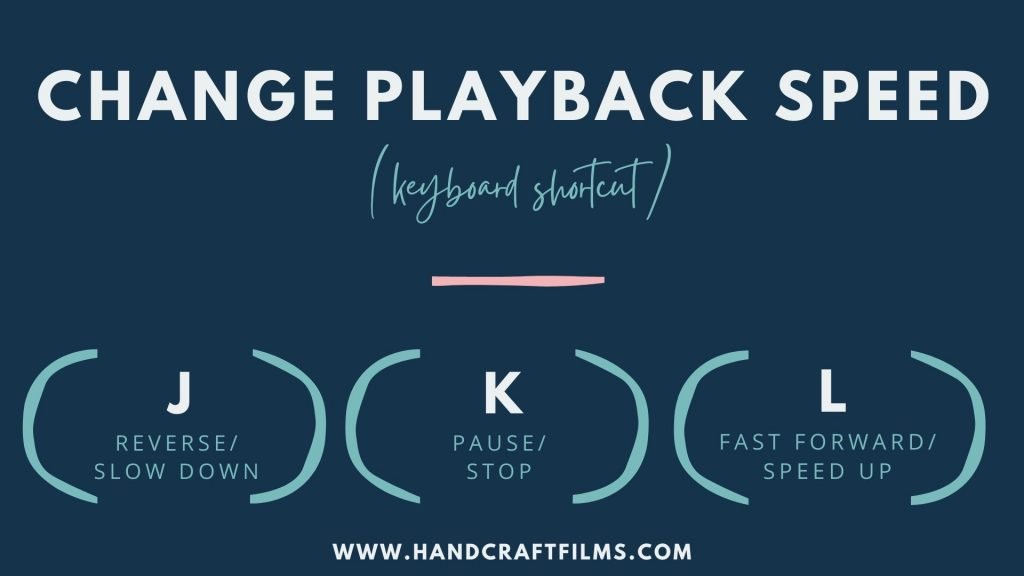
While you are watching your video preview, you can hit ‘L‘ to speed up the playback of your video.
Hit it multiple times to increase the speed at which your clip will playback.
Hold down shift while hitting the L button to increase at smaller and more controllable intervals.
3 | How to Reverse or Slow Down Playback Speed
As you are previewing your video clips, you can hit ‘J‘ to rewind the playback of your clips, or to slow down the playback if you’ve already begun playing the preview.
The more times you hit J as you playback, the faster the clip will playback in reverse.
If have already hit L multiple times to play forward in fast motion and then hit J, it will slow down the speed at which your clip is playing in fast motion.
Combine shift with J to make micro adjustments to how fast or slow your clip plays in reverse or slows down.
Conveniently, the letter K sits right in between the letters J and L.
This allows your fingers quick and intuitive action as you control playback of your clips. Use the letter K to quickly pause between fast forward and reverse of your clips.
Hitting the letter K simply pauses or stops playback.
4 | How to Play a Clip in Slow Motion
Understanding frame rates.
By default, Premiere Pro is going to play your imported clips back at a certain frame rate (for example 24 fps, 30 fps, 60 fps, etc).
This frame rate will be based upon your sequence settings. Learn more about setting up sequence settings for the first time here.
If you decide to match your sequence settings to your clip settings, then your playback should match up perfectly with the frame rate that you shot your clips with.
However, there are times when you will want to alter these settings in order to play your clip back at a different rate.
How to Playback Clips in Slow Motion
If you shot your footage in 60 fps or 120 fps, but you want the footage to play back in slow motion, then you need to alter your playback speed settings to either 24 fps or 30 fps.
This will give your clips the desired slow motion playback effect.
Here’s how to do it.
Right-Click on the clip (or clips) in the Project Panel and select Modify -> Interpret Footage
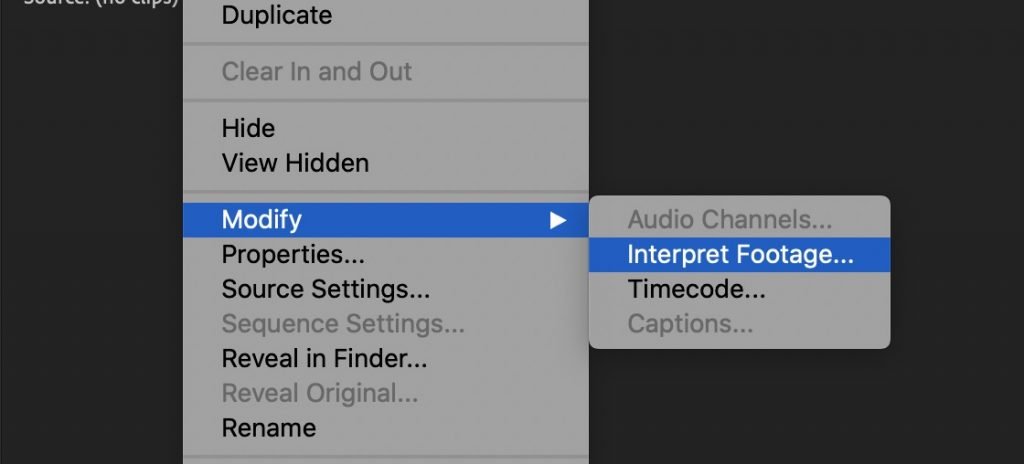
A new window will pop up, asking if you want to use the same frame rate at which the clip was shot or if you want to interpret the footage at a different frame rate.

In this case you want to select the second option, ‘Assume this frame rate:’ and here you’ll enter either 24 fps or 30 fps depending on your preference.
I always use 24 fps for a more natural and cinematic look to my videos.
As a rule of thumb, you want to be sure that you don’t set your frame rate any lower than half the frame rate at which the footage was shot.
For example, if you shot your footage at 60 fps, don’t interpret it any lower than 30 or 24 fps or your clip will appear choppy upon playback.
If you shot your footage in 24 fps or 30 fps, you simply can’t play it back in slow motion. There are not enough frames captured in your footage to avoid choppy playback at those speeds.
5 | What To Do If Playback Speed Is Choppy
Here are three common reasons your clip playback may be choppy and how to easily fix the problem.
1. You might need to render your clip.
If you notice a red or yellow bar above your sequence in the timeline window, then you may need to render your preview before playing back your video.
Navigate up to Sequence -> Render In to Out
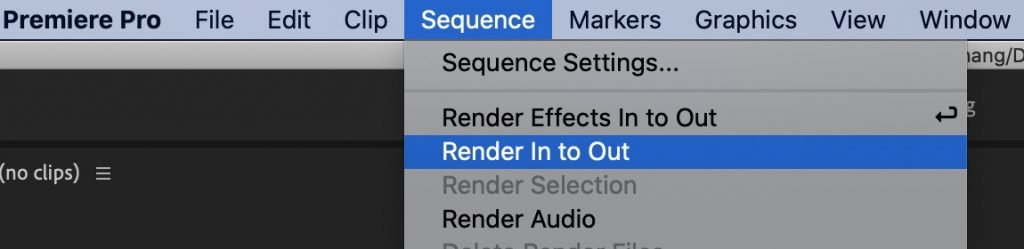
Once the line above your sequence turns green, you should see smoother playback.

2. Your frame rate may be too slow.
If you shot your footage in 24 fps or 30 fps, then do not try to slow down your footage.
You need to shoot at at least 60 fps or higher in order to have smooth slow motion footage.
Make sure that you haven’t set your fps more than half the amount at which you shot it. (For example: 60 fps = no less than 24 or 30 fps interpretation
3. Editing from an external hard drive that’s too slow.
I always store my footage on a hard drive that’s separate from my computer. I bet many of you do too.
But did you realize that it takes time for your computer to constantly pull footage back and forth from your hard drive to your computer?
If you aren’t editing on a fast enough hard drive connection, this can cause a lag in Premiere Pro.
I highly suggest purchasing an SSD drive to speed up your editing workflow. If you don’t know the difference between an SSD drive and an external hard drive, you can check out this post all about it here.
In short, an SSD drive is much faster, smaller, and more durable than a traditional external hard drive. While they are more expensive, I believe the cost is well worth it. Especially if you are having issues with speed and playback.
Here’s my favorite SSD drive right now.
4. Your computer processor might be overloaded.
For this last example, there are a few fixes you can try, depending on your specific issue.
Let’s start with the easiest.
Change the Playback Resolution
If you feel like your computer is simply having trouble keeping up with the playback of your video, you can change the resolution at which you watch the preview.
Instead of watching the video back in full high res 4k, for example, you can set it to watch back at a little lower quality. Usually this isn’t terribly noticeable, or even important when you’re simply getting your basic edits together.
To change the playback resolution, navigate up to the Program Panel and click on the drop down menu in the lower right corner.
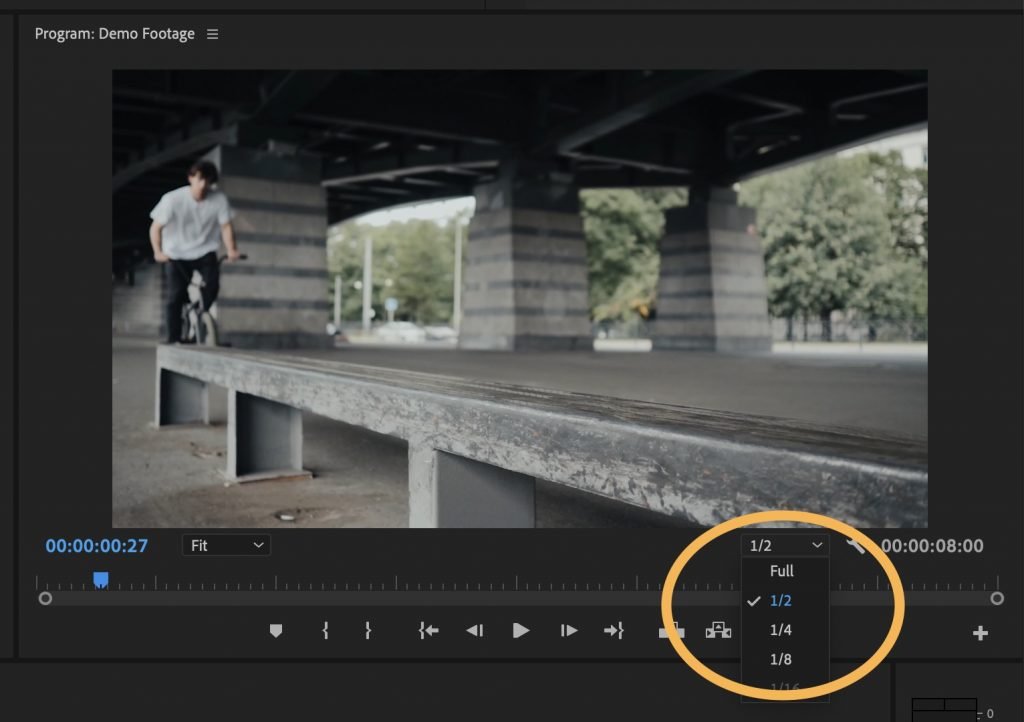
You’ll now see several options of how high you’d like to set your playback resolution. The lower the resolution, the easier time your computer will have keeping up.
Turn Off High Quality Playback
Click on the little wrench icon in the lower right hand corner of your Program Panel.

Uncheck the option for ‘High Quality Playback‘.
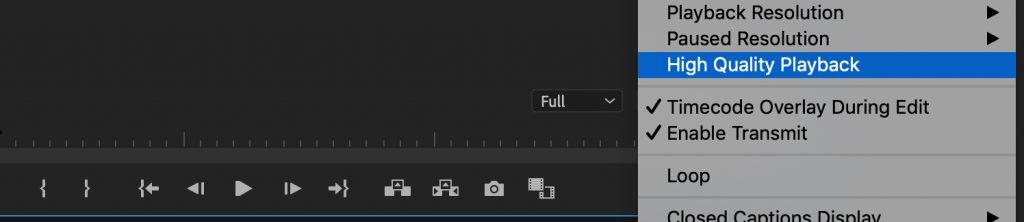
This will ensure that Premiere Pro is not trying to work any harder than you’d like it to.
Remember you can always turn this function back on when you’re ready to playback your final edited copy of the video.
Preserve Enough RAM
You can designated exactly how much RAM your computer is putting forth to Premiere Pro versus other programs running on your system at the same time.
Getting these settings right will ensure that Premiere Pro has enough RAM to function and playback your clips smoothly.
In the top menu navigate up to Premiere Pro -> Preferences -> Memory
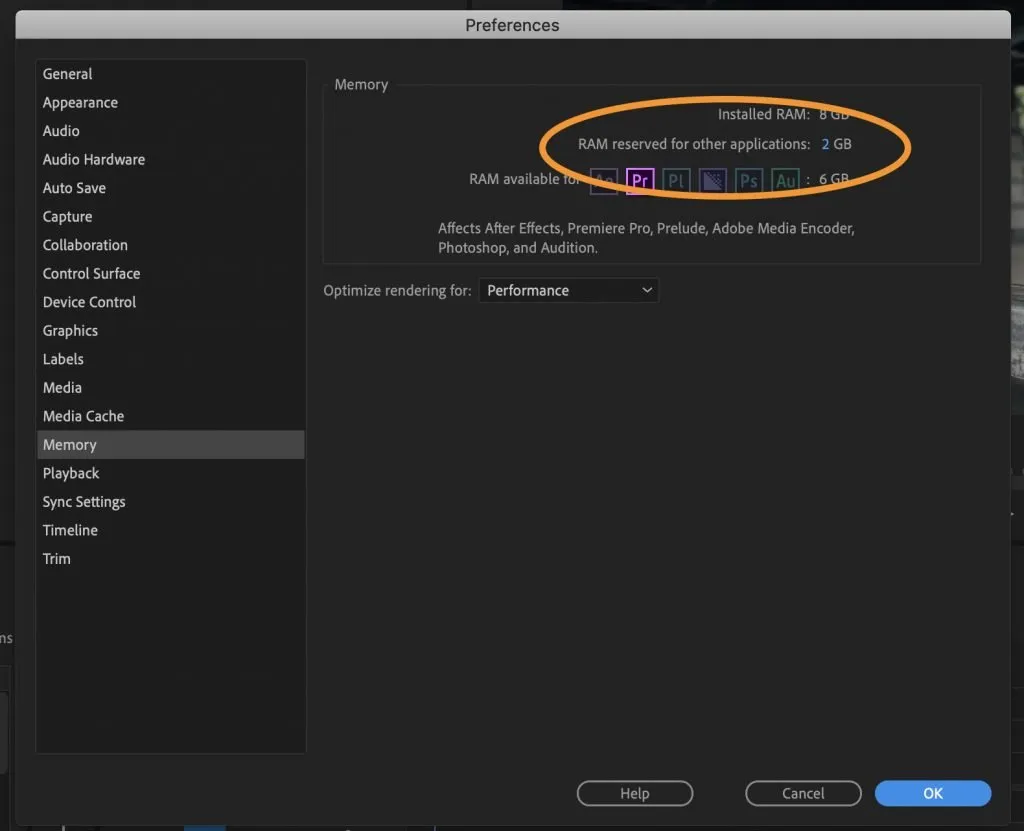
Reserve less RAM for other applications and allocate more towards Premiere Pro.
Enable GPU Acceleration
If you’re still dealing with lagging playback, try this last option to ensure that your computer’s graphics card is helping Premiere Pro out as much as possible with the processing of your project.
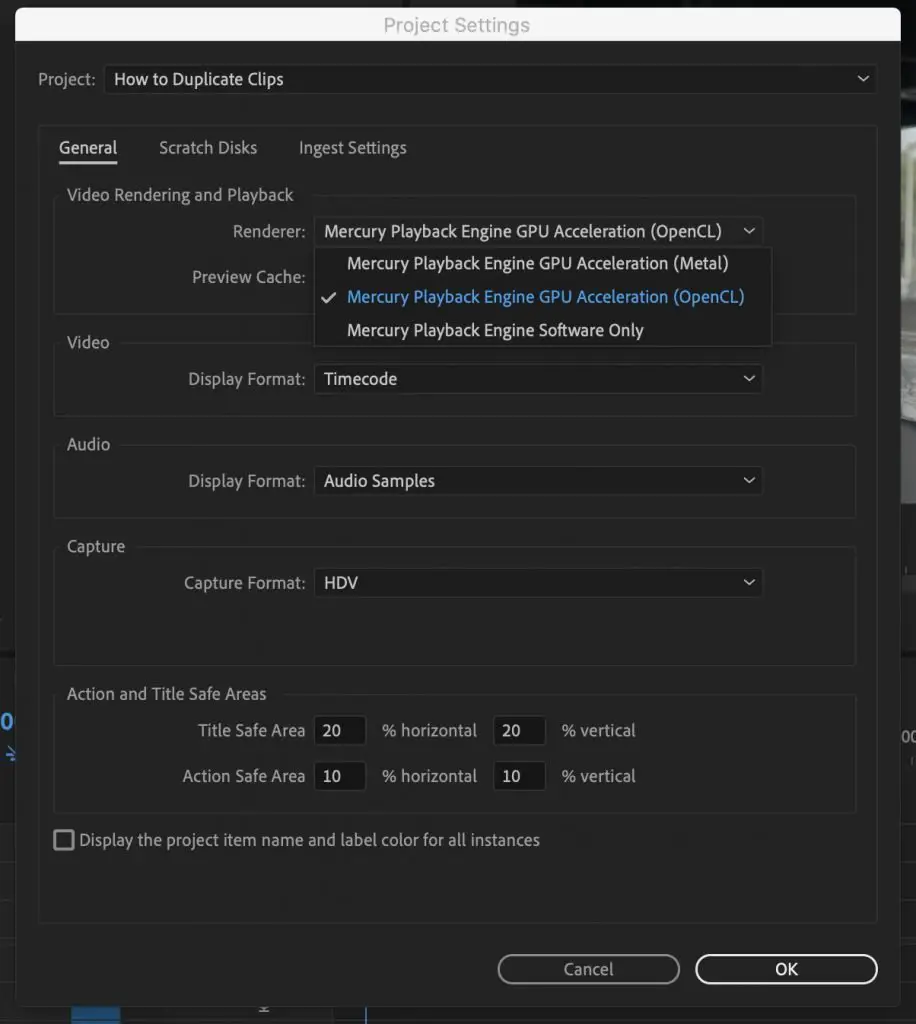
Navigate up to File -> Project Settings -> General
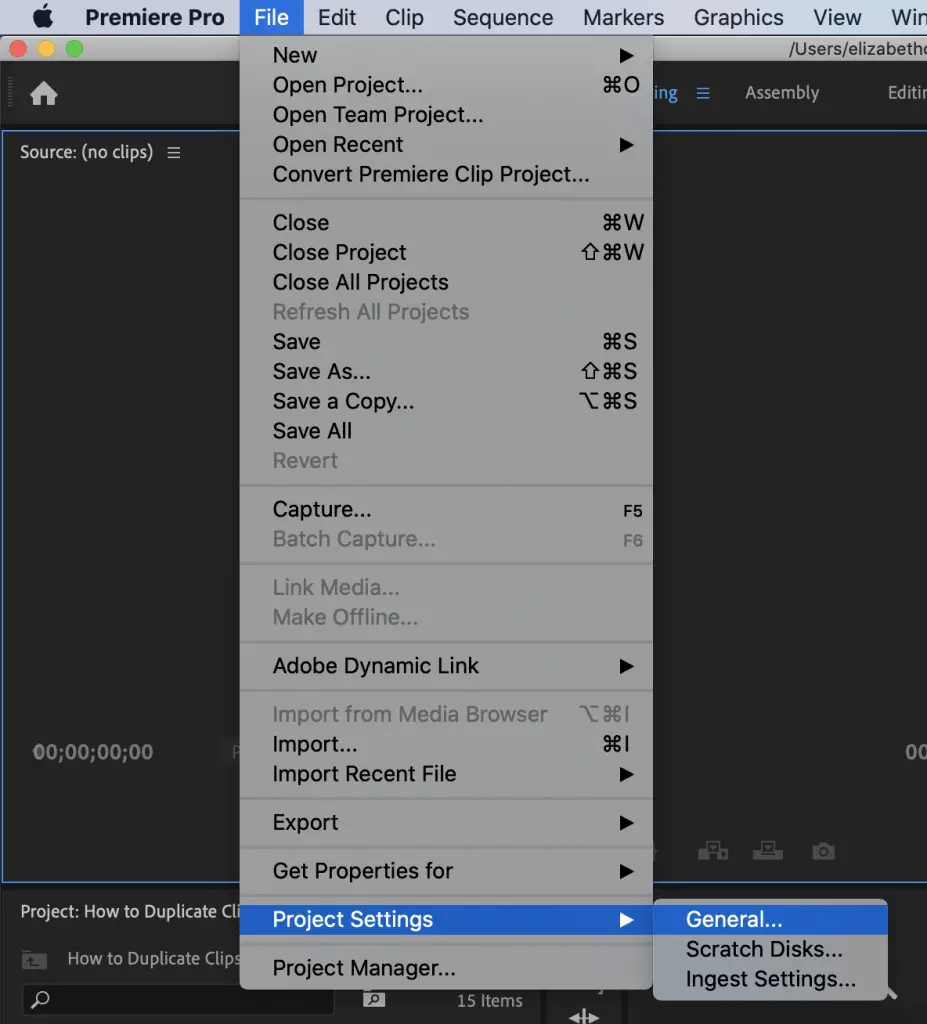
Click the option for Mercury Playback Engine GPU Acceleration.
Turn Off Lumetri Scopes
Lastly, you want to make sure that there aren’t any extraneous graphic elements happening on your screen during playback, i.e. Lumetri curves or color graphs.
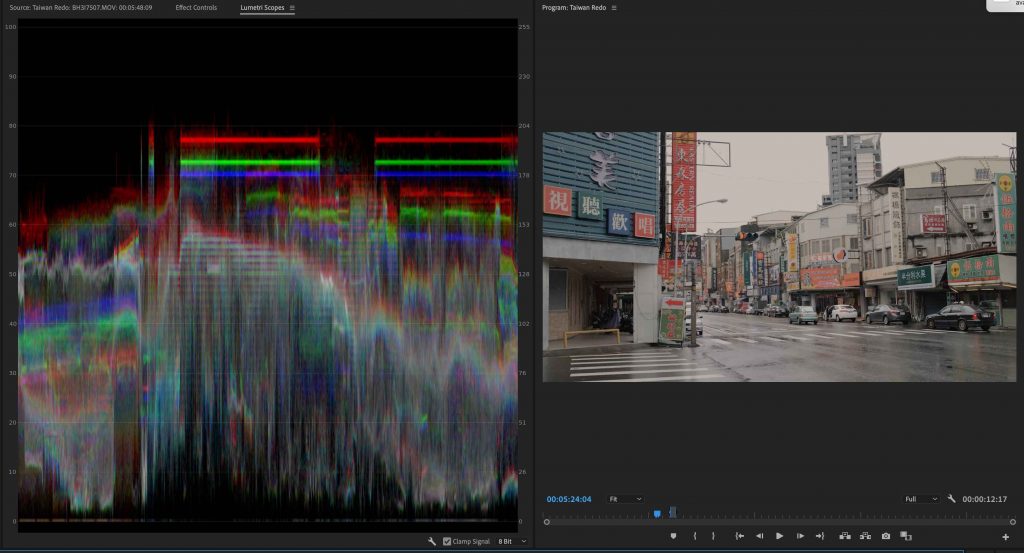
You’d be surprised at how much energy your computer uses to keep these scopes going during playback. You can always open them back up once you’re done previewing your video.
Concluding Thoughts
As always, let me know any further thoughts or questions you have in the comment section below.
Or visit our free, private Facebook group to ask me questions directly.
Happy Editing,
Beth