How to Render and Edit Faster in Premiere Pro
I was recently editing a project for a client that involved a complicated series of clips and effects at the very beginning of the film.
I was working hard to get the timing correct and iron out the details, yet every single time I made a change, I had to render the project in order to properly review it without dropping frames and being unable to view it in real time.
It took each simple tweak several minutes to render before I could make another change to review. Sooo time consuming.
In today’s post we’re going to look at a few methods for speeding up your render process and overall workflow in Premiere that could end up saving you hours of time for your next project.
Turn GPU Acceleration On
Obviously you want to make sure your system is functioning at it’s best. The speed of your computer does greatly impact the speed of render, but there’s only so much you can alter there without spending lots of money on a new computer.
Let’s talk about a few quick tweaks we can make within the software itself to give ourselves a head start.
The first easy thing we can do is to make sure that GPU Acceleration is turned on.
GPU Acceleration is a fancy way of saying that the computer will allow both the graphics processing unit (GPU) and the computer processing unit (CPU) to run together in order to facilitate more difficult and complicated processes (like many things done in Premiere Pro).
In order to confirm that you’ve turned this feature on, navigate to:
File > Project Settings > General
Under “Video Rendering and Playback,” there’s a “Renderer” dropdown. From this dropdown, you should select “Mercury Playback Engine GPU Acceleration.”


For Mac users, choose the recommended (Metal) option on the top. For PC users, you should have CUDA as an option.
Clear Your Media Cache + Faster SSD Drive
Every time you import a file into a Premiere Pro project, various types of media cache files are created. We won’t get into the details of these files, because frankly they are complicated computer language. Just know that they are there and after some time, the media cache can begin to eat up valuable hard drive space.
If this goes unchecked for too long, it will eventually eat up all your space and slow things down.
Note: merely deleting the Media Cache isn’t likely to boost performance unless your hard drive was dangerously close to full.
However, you can optimize Premiere’s performance a bit by heading over to Premiere Pro > Preferences > Media Cache > Browse


Move the location to a faster SSD external drive
You can then change the location of your media cache. By selecting a location on a separate (faster) drive, you are likely to see an improvement in performance. This may be a more affordable alternative to purchasing a completely new system.
Solid state drives are the fastest and becoming more and more affordable – Samsung has an excellent one for under $100.
You also have the option here to set up parameters for Premiere Pro to periodically clear out some old cache files. You can choose whether you’d like this done after a certain amount of time or once a certain cumulative file size is reached.
Note: deleting old cache files doesn’t delete your media or footage at all. It simply deletes the computer’s secret extra files. If you are done with a project and unlikely to touch it anytime soon, it’s completely fine to clear out your cache. The computer can rebuild those files for you the next time you open the project.
Increase Memory Allocation
This function basically gives Premiere Pro the permission to take up more computer juice than the other programs running on your computer at the same time. It can significantly boost the performance of premiere while editing.
Premiere Pro > Preferences > Memory
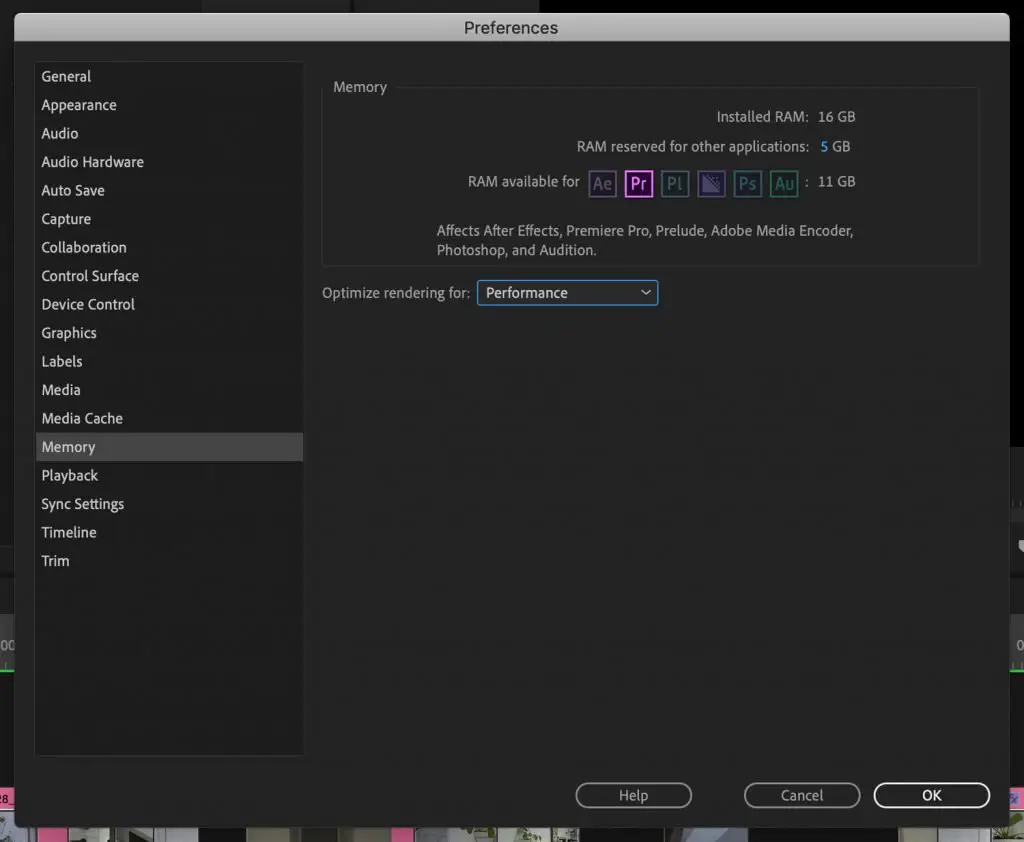
Depending on how much RAM you have available on your system and what other programs you need to be running simultaneously, you can play with this amount until you find the right balance for your needs. If you just want the fastest render and performance in Premiere, then go ahead and give it all the juice.
Note: I have read that giving Premiere ALL the juice doesn’t always enhance performance. Debate is out. Play around with it and let me know what differences you notice.
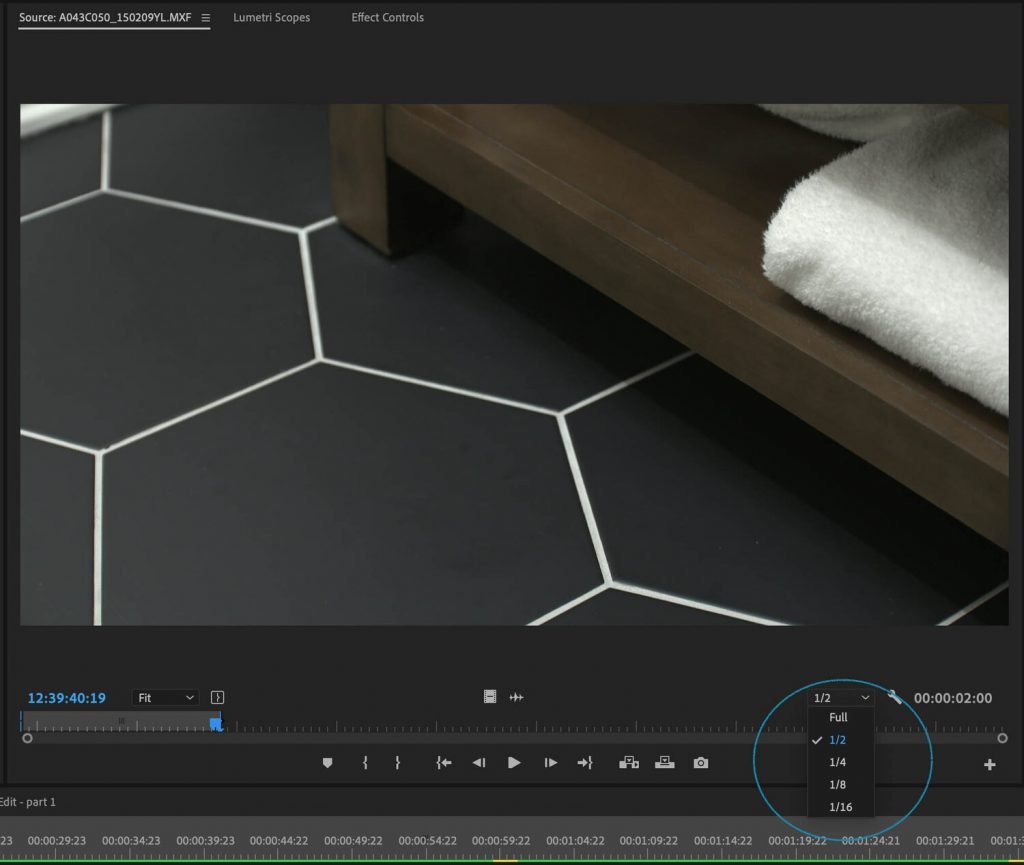
Adjust Your Playback Resolution
This is a super easy little hack that can make playback much smoother and quicker. Please note that though it will look like your video has dropped in resolution, this is just the preview file. Your actual video quality will not be changed.
To enable simply click on the tiny little dropdown in the lower right corner. You can set it at 1/2 or 1/4 resolution depending on how slow your computer is acting. Play around and see how much your computer can handle and adjust accordingly.
Render and Replace Dynamically Linked Comps
If you have some text or graphics that you’ve linked from another program like After Effects, you can use the render and replace function to drastically reduce render time and improve the overall quality of your playback.
Right click on your dynamic linked comp and hit ‘Render and Replace’.

Close All Unnecessary Panels
After you’ve finished color correcting, go ahead and close the Lumetri scopes panel.
This isn’t one that I would have guessed, but that I came across while doing some research on this topic. Apparently, having the scopes open during playback uses up unnecessary computer processing. So simply turn the panel off when you don’t need it.
In the same line of thought, displaying Safe Margins, Transparency Grid and Overlays also require a little extra juice from Premiere Pro. It’s best to just turn those off as well if you’re not actively using them. You can find them under the Program monitor settings (the little wrench icon).

Edit Using Proxies
Proxies are an easy way to exponentially speed up the editing process for big projects. A proxy is simply a roadmap that you can create for Premiere Pro to edit from, often called ‘offline editing’. Sort of like sourcing the shell of the footage instead of the bulk of it.
There are many ways to create proxies, some more complicated than others. There’s a great article about it here, if you want all the details. In short, I’ll show you how to quickly add them mid-project.
In the Project Panel, select the media that you want to create proxies for and right click on it. In the context menu, choose Proxy > Create Proxies.
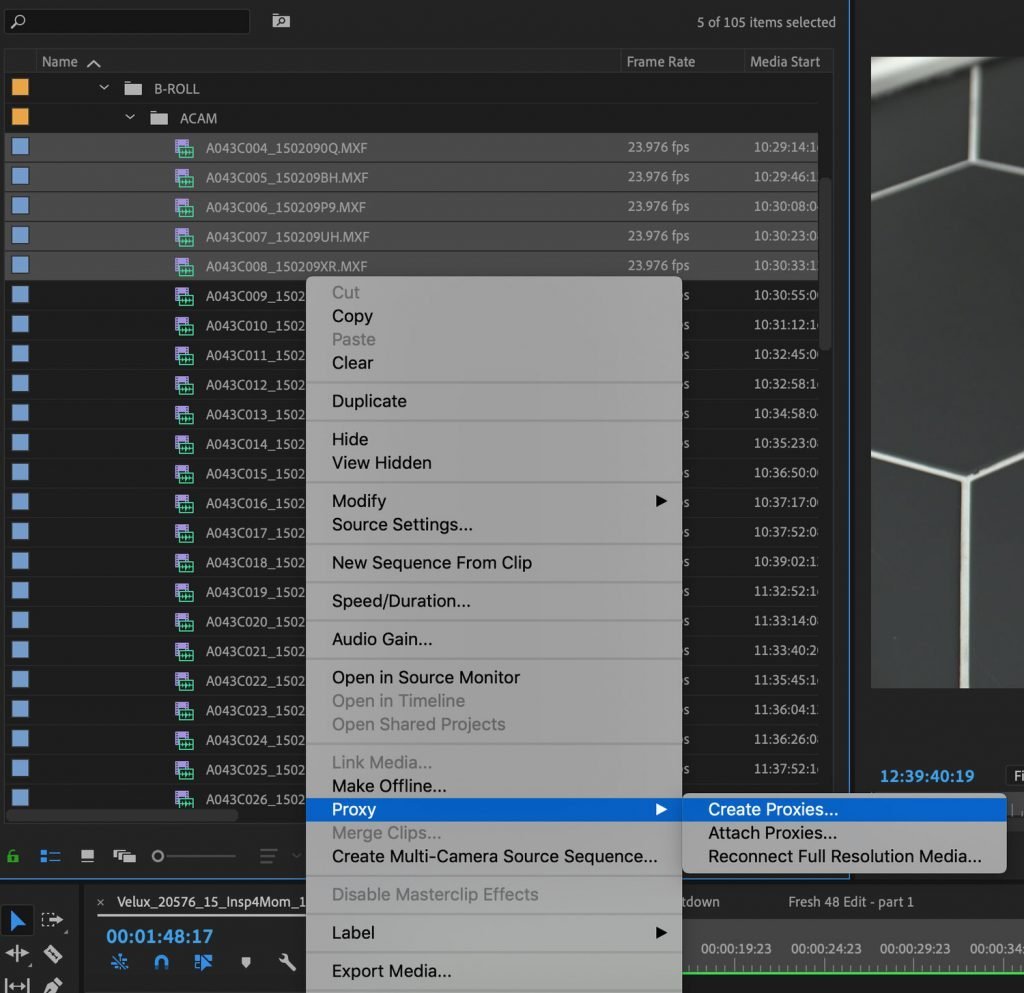
Click on the format box and you’ll see two options: H.264 and Quicktime.

These options will tell you the presets options for you proxies. The options under the preset menu will change according to which option you choose.
There are two options for Destination:
- Next to Original Media, in Proxy Folder: If you choose this option, Premiere will create a new folder for each proxy clip, in the same directory as the original high res media. This process can be complicated since many cameras save files in unique locations. You’ll have a hard time grouping the proxies to move them to another drive, or deleting them when you’re done with the project.
- Browse: I recommend browsing and selecting your own destination to ensure that all of the proxies are in the same folder.
Go ahead and set your preset and destination and then click ok. A creating proxy jobs progress bar will pop up, which tells you that Premiere is sending the clips over to Media Encoder. If you cancel this progress bar, the whole proxy creation process will be canceled and the clips will never be added Media Encoder’s queue.
Concluding Thoughts
Thanks for checking out these tips on a few things you can do to speed up your render time and workflow process in Premiere.
As always, please reach out with any questions or feedback in the comments below!
Share on Pinterest: