You could spend a fortune buying expensive camera and filmmaking gear, quite literally.
And I will admit that there are some items you simply shouldn’t skimp on. (Ahem, lenses.)
However, there are other accessories that saving a little cash on isn’t necessarily a bad thing. Especially if you can replicate the results with household items already on hand.
So, whether you’re a college student, a beginner filmmaker, or just trying to save all the extra cash for that next big lens or camera purchase, this post is for you.
Today we’ll cover 17 great filmmaking hacks to save you money without sacrificing the cool effects.
Be sure to check out our top filmmaking techniques that every filmmaker should know as well.
This post does contain Amazon product recommendations. As an Amazon associate, I receive compensation for qualifying purchases, however any commission that I earn comes at no cost to you.
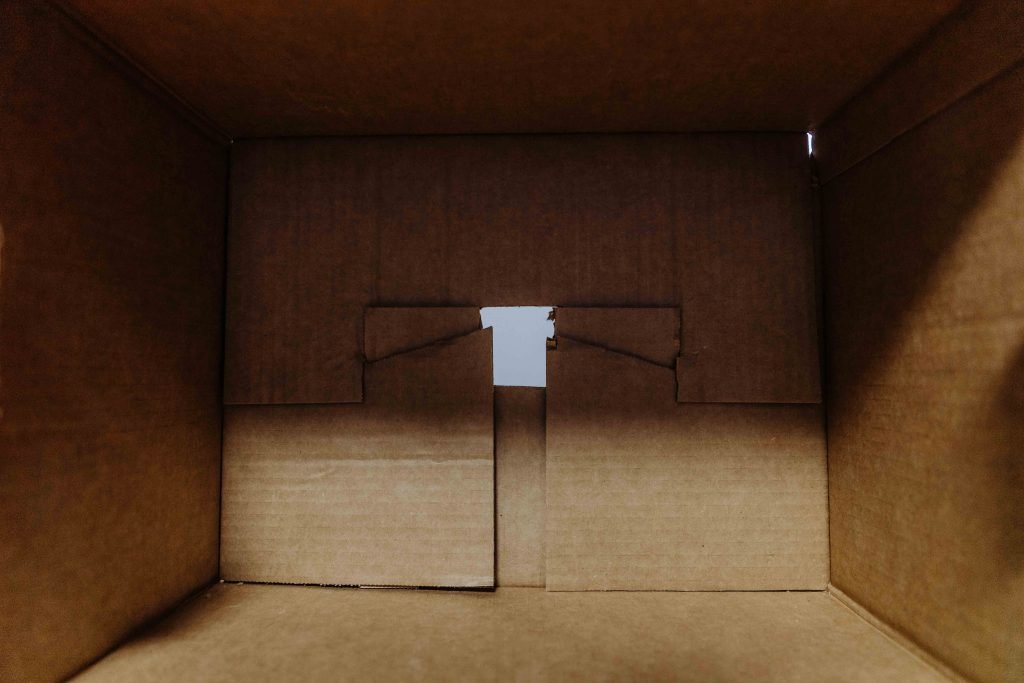
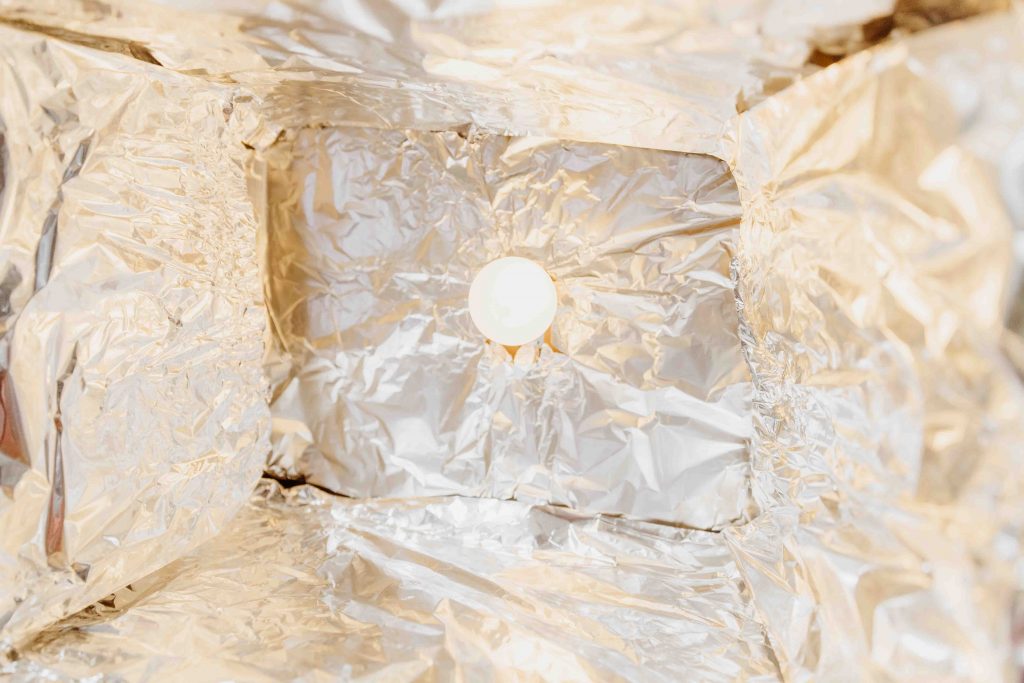
1 | Shoebox Light
For this first hack, you’ll be making a simple key light to be used in interview setups or simply to add extra ambient light to your shots.
Here’s what you’ll need:
- Shoebox or Small Cardboard Box
- Aluminum Foil
- Light source (preferably an LED bulb, but a flashlight can work as well)
- White Printer Paper

A word of caution: whenever working with lights, especially DIY lighting set ups, it’s important to pay attention to how hot your light source is. Make sure it isn’t touching paper or cardboard as it can easily catch on fire.
I recommend something like these inexpensive puck lights that require no extra cords and don’t heat up like incandescent bulbs will.
- With your shoebox, you’ll want to cut out a hole that’s exactly the size of your light source.
2. Next line the shoebox with aluminum foil that will work as our reflector.
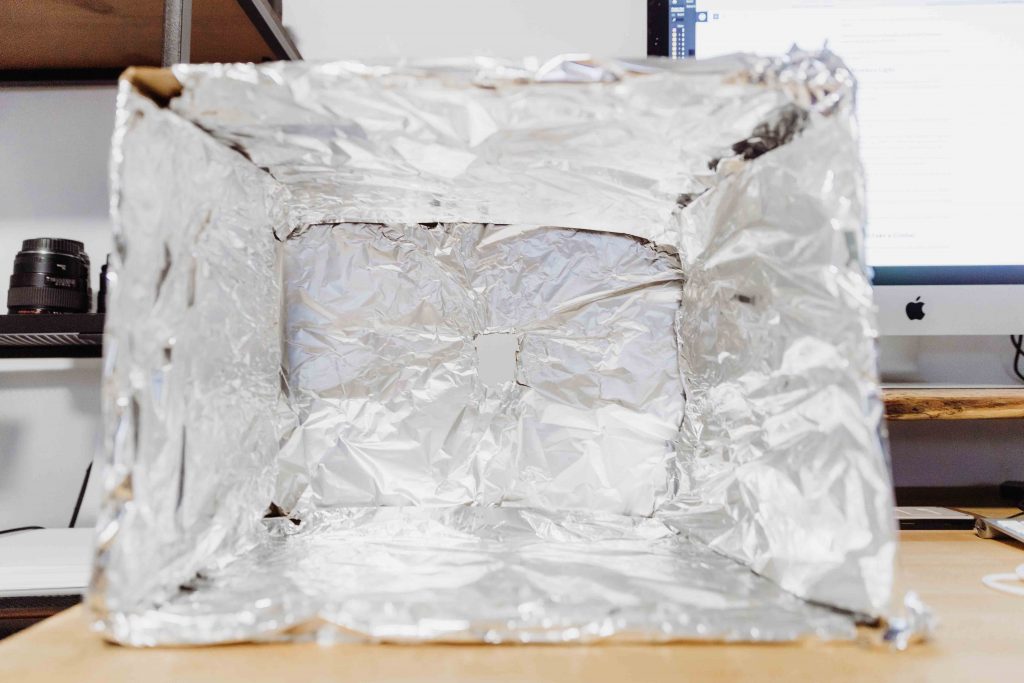
3. Now place your light source through the hole so that the bulb is inside the shoebox.
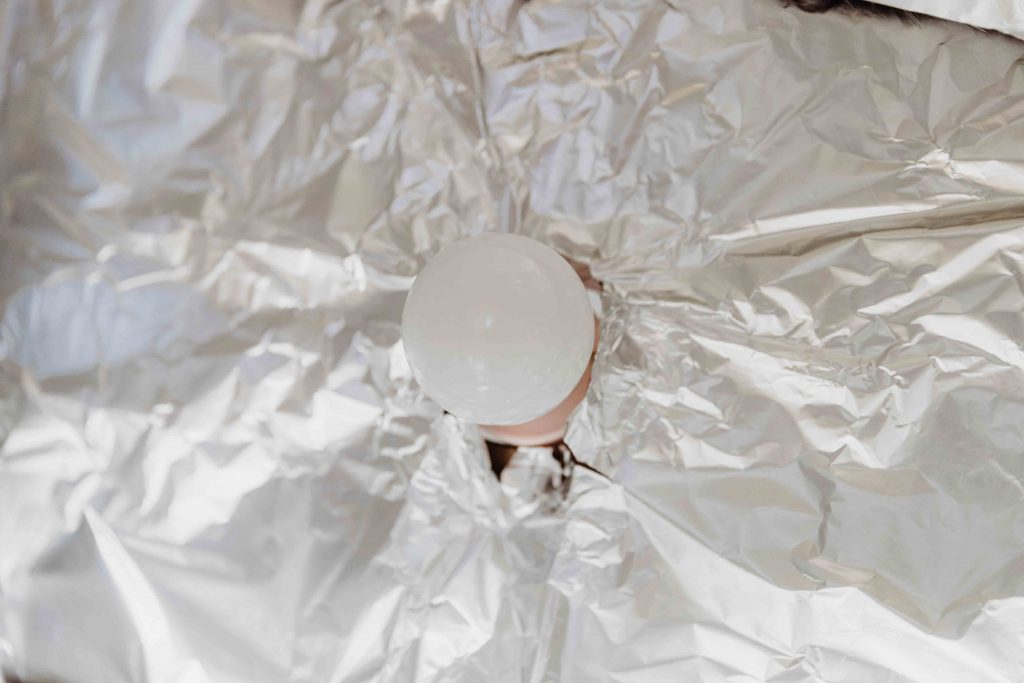
4. Finally, attach the white printer on the outside of the shoebox to act as a diffuser for the light.
2 | How to Fake a Gimbal
Here’s an even simpler filmmaking hack that only requires one household item – a belt.
Take the end of your belt where the buckle is and attach it as tightly as you can around your camera. Now with the your camera as the weight at the bottom, hold the top of the belt at the top, like a swing.
Very gently, slowly and carefully, you can move around wile holding the top of the belt with the camera filming.
This makes for super, smooth steady cam motions without all the expense.
Just be extra careful not to go slow and don’t dump your camera in the process!
3 | Desk Chair Slider
Next we’ll cover a few simple tools around the house that you can use as a slider for your various shots.
Sliders can be costly and while they look the most professional, may not always be necessary for simple shots you want to grab around the house.
The first method is the desk chair slider. Simply sit on a rolling desk chair with your camera in hand. Now push off in your desired direction, moving slowly and smoothly.
You can also let the camera sit in the seat of the chair to give you more control of where you move the chair.
This will allow you to capture nice, smooth moving shots for no extra cost.
4 | Kitchen Towel Slider
The next filmmaking hack is the best for any sliding shots that you’d like to capture at desk height. All you need here is either a piece of cardboard or a kitchen towel.
With your camera resting on the cardboard or the towel, grab the other end of the towel or cardboard and simply drag it slowly across the desk or countertop.
Focus on making the movement uniform, slow, and steady.
Pro tip: with all of these shots, because you camera will be moving without you being able to change it’s settings, you’ll need to make sure that you aren’t losing sharp focus on your subject in the process.
If you don’t have autofocus on your camera, here are two ways to ensure that you are able to keep focus while moving.
Option 1 – stop down on your aperture setting. This means using a higher f-stop (about f/8 or higher). This will ensure that there is a larger range of objects within your field of focus.
Option 2 – make sure that you are moving along the same plane as your subject. If your subject is two feet away, make sure that as you move you maintain that exact same distance at all times.
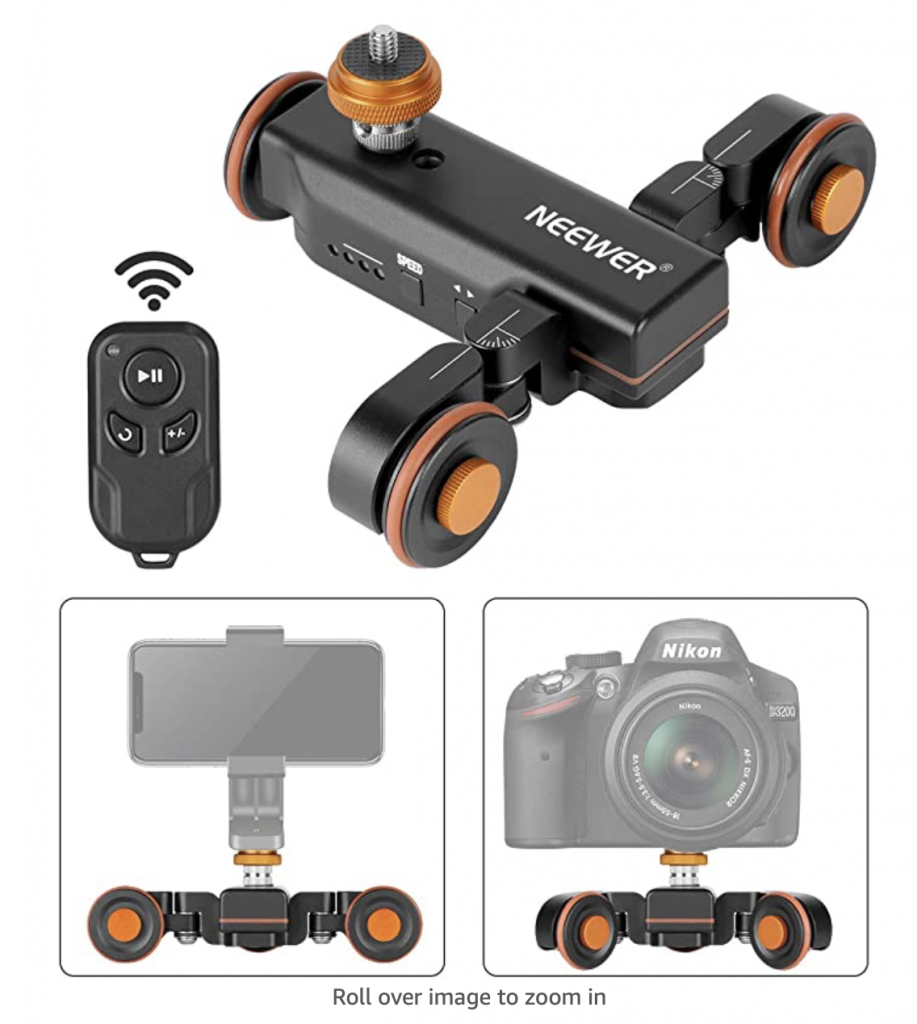
5 | Skateboard Slider
Lastly on our list of slider hacks, there’s the skateboard slider. You’ve probably all seen this one already, but it’s a classic, so it’s worth mentioning.
All you need is a skateboard, any kind will do. It just needs 4 wheels 🙂

If you know how to ride the skateboard, obviously you can ride while holding the camera.
For lower shots or to use on another surface like a tabletop or countertop, simply place the camera on top of the skateboard and use it to roll the camera around for smoother shots.
If you do have a small budget for a great slider and want something a bit more stable and versatile, definitely check out the Newer 3-Wheels Camera Remote Control Dolly for DSLR cameras and iPhones. It’s affordable and very cool.
6 | DIY Light Diffuser
The pitfall of many DIY filmmaking lights is the lack of diffusion. For beautiful filmmaking, you need complete control over your light sources. Part of this control comes from being able to diffuse or soften harsh light.
For a cheap household item to use for diffusion, a $4 white shower curtain works wonders. Here’s cheap, but sturdy clamp to secure the shower curtain in front of your light.
If you’re looking for a light source, you can use household LED light bulbs, an open laptop, or if you are looking for something a bit more versatile but still affordable, check out the Neewer Dimmable LED lights over on amazon.
7 | DIY Sound Panels
When it comes to capturing great audio, you want to eliminate as much echo as possible. A standard room can sound amateur if there is too much natural echo, even with a high quality mic.
To eliminate this problem, simply drape as many moving blankets as you can around the room. If you don’t have moving blankets, ordinary blankets will work as well.
Without allowing them to show in the shot (obviously), simply hang or drape them as closely as possible around your audio source using chairs or other furniture. Here are some cheap, but sturdy clamps to help you hang them.
8 | Lens Flares
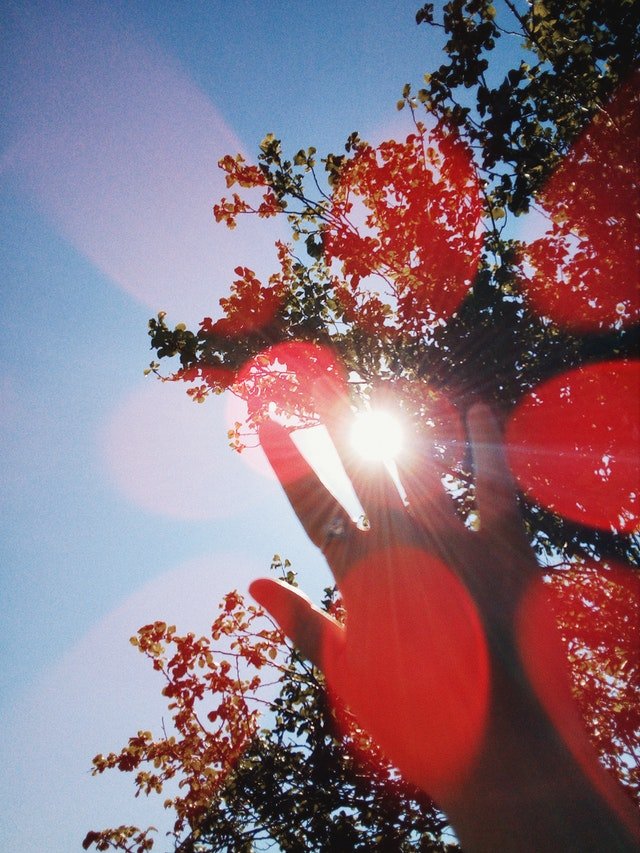
For a little extra style, you can use a small handheld flashlight or even the light on your iPhone to create unique lens flares in your shots.
Use the light source to shine the light at various angles, close to your lens for this unique, film-like effect. Play around with the angles and distance of the light until you achieve the desired effect.
9 | Unique Reflections
Using all kinds of household items, you can create unique reflections and lens diffusers for your shots.
Here are a few examples that you can experiment with to achieve creative effects: various necklaces (hang directly in front of your lens), CDs or DVDs, pocket knife, loofa, plastic bag, scotch tape, fishing line (this will bend the light, creating anamorphic lens flare effect).
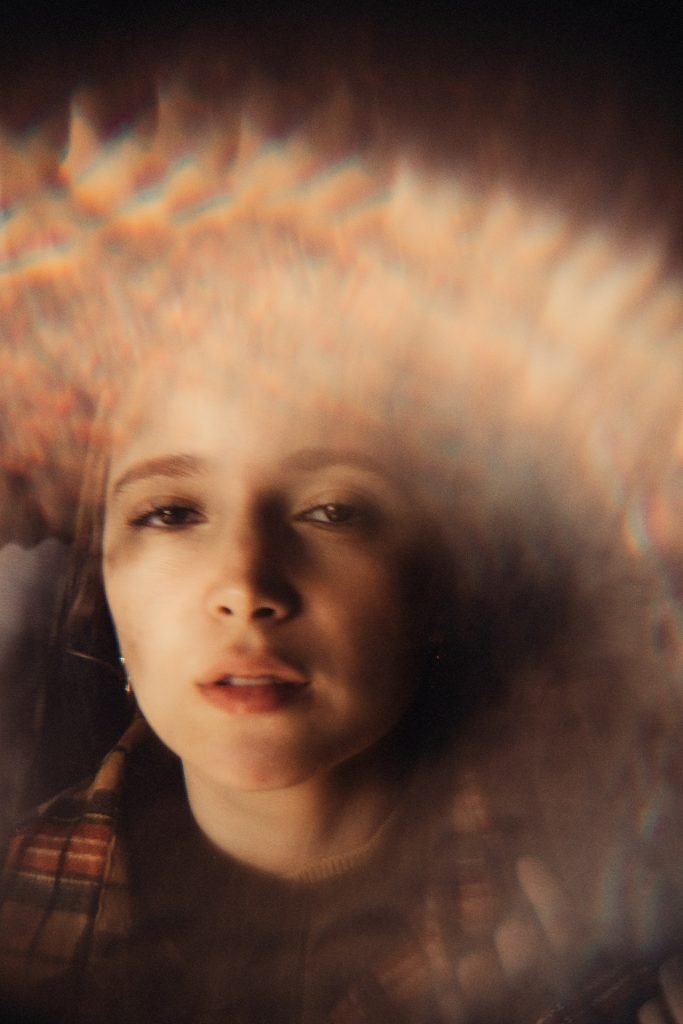
To use these items, simply shoot straight through them or hold them at a 90 degree angle directly underneath or to the side of your lens.
You should begin to see various lights, shadows, and colors creating hologram like effects on your footage.
10 | Make Your Own Macro Lens
I can’t believe how easy this hack is.
Using an old toilet paper roll, detach your lens and place the toilet paper roll in between the camera and your lens.
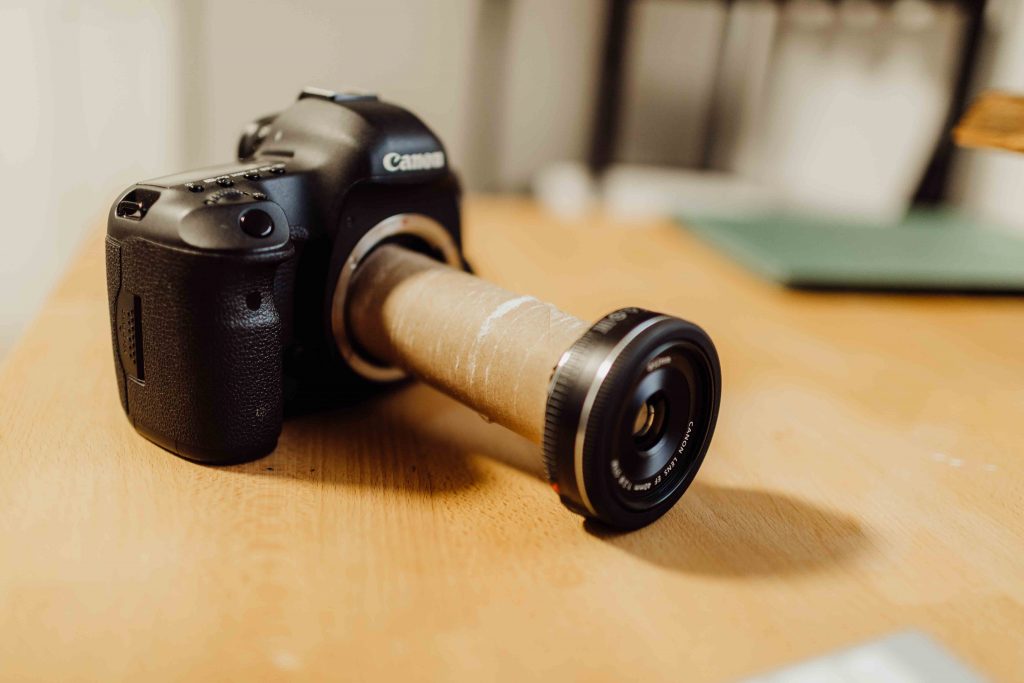
This will work to extend the length of the lens and give you that desired macro effect.
You can also find inexpensive lens extenders on amazon if you prefer to have a way to permanently attach your lens (to free your hands from holding so much).
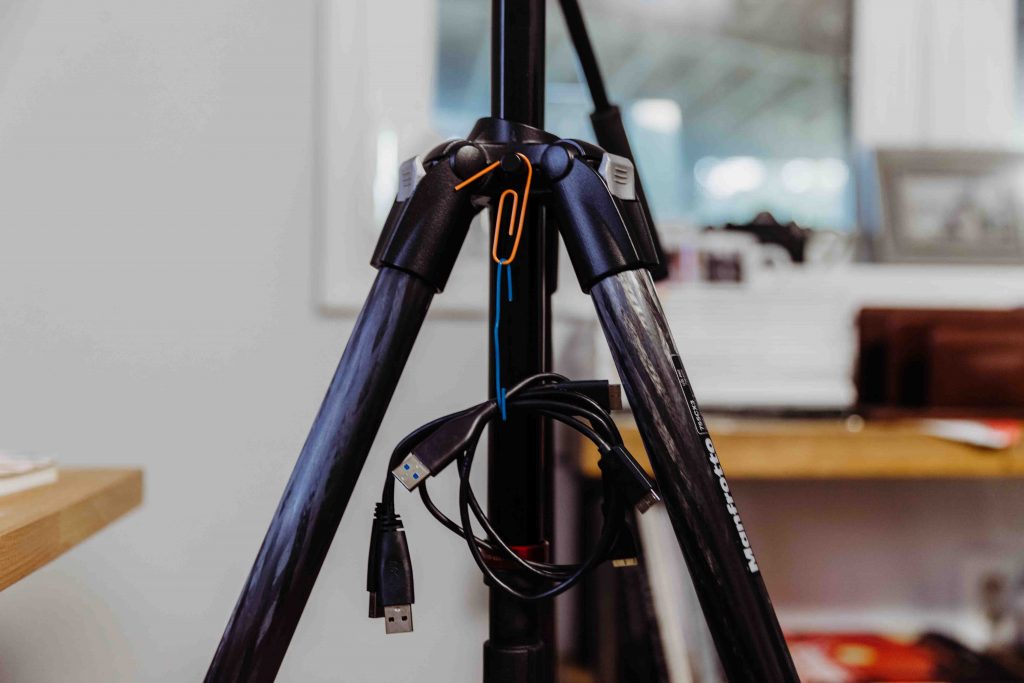
11 | Paperclip Hangers For Cords and Small Items
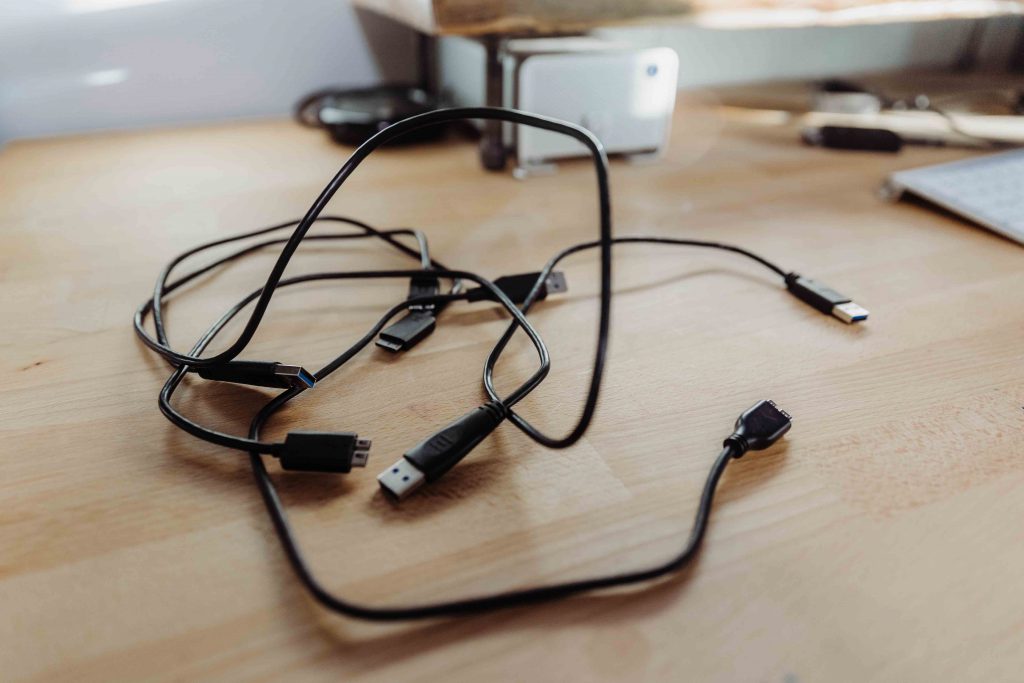
Nothing is more annoying than loose cords, tangled together and making a mess. The simple solution is likely right under your nose. Or in your kitchen junk drawer – a few paperclips!
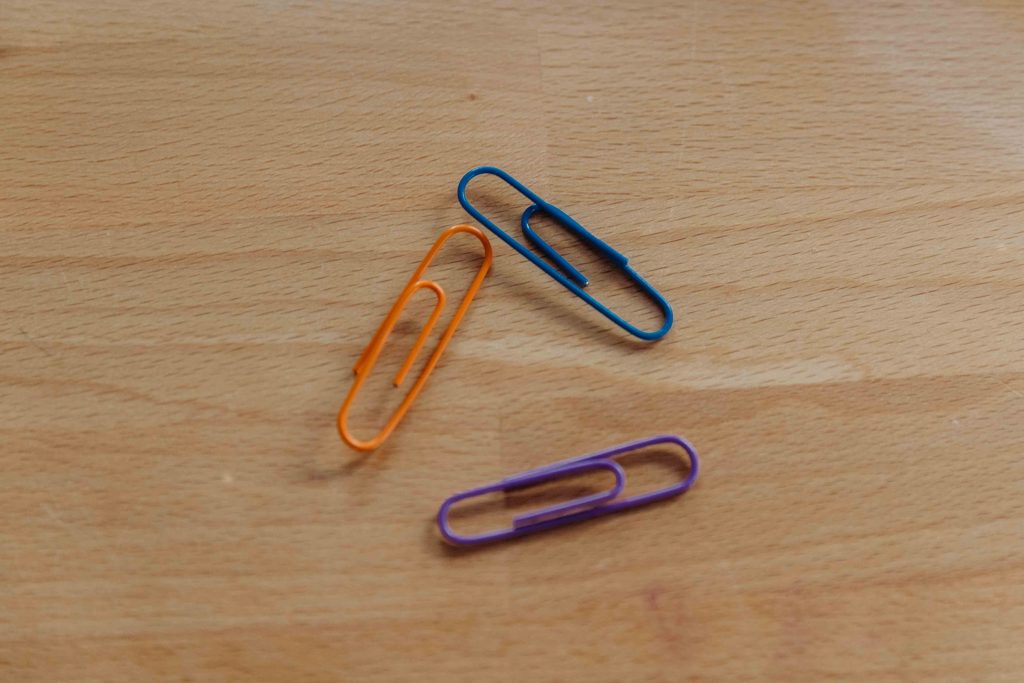
Simply open up the paper clips to rewire them to create hangers from which you can hang those loose cords to get them organized and out of the way.
12 | Memory Card Case
Here’s another quick and easy idea for staying organized. This one is especially helpful for organizing SD or other sized memory cards.
You need a small tin case, like the ones that Altoids mints come in.
Now, depending on the size of your cards, you can either simply use this as your case – or – using some sturdy cardboard you can cut two strips to the exact lengths of the box, one wide and one narrow.
Cut a slot in one of the strips of cardboard so you can overlap the two strips, making what looks like a plus sign. Now you have four sections within the tin can to hold your memory cards and keep them from sliding around.
13 | DIY Overhead Camera Rig for Top Down Videos
Find a chair with open slots in the back of it. Configure your tripod sideways at 90 degrees in such a way that the legs of the tripod fit into the open slots of the chair and work as a counterweight to the camera.
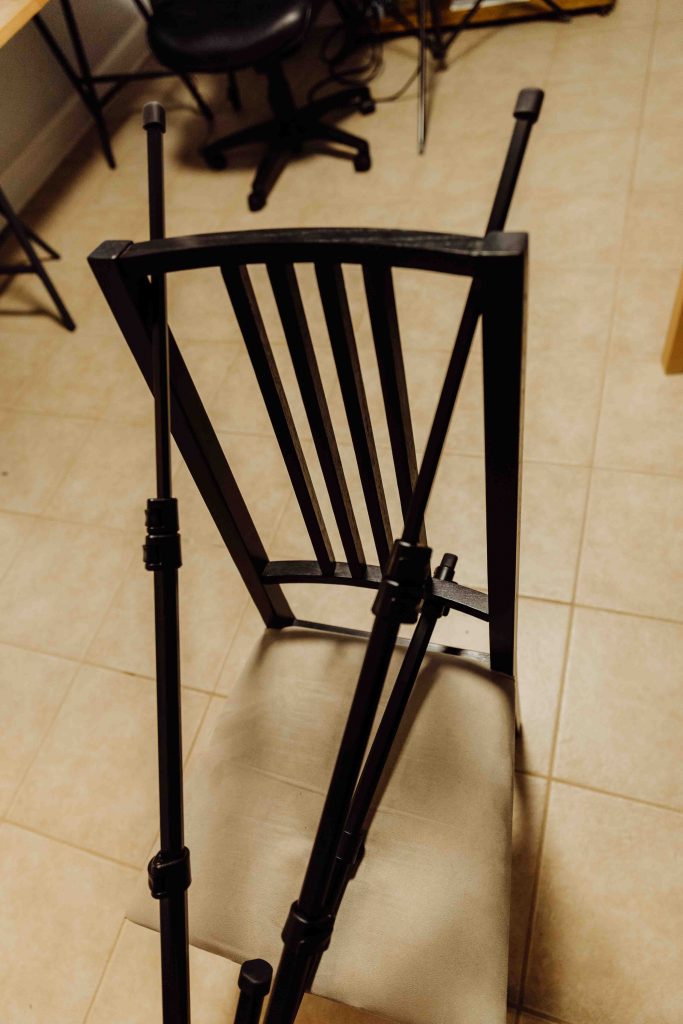
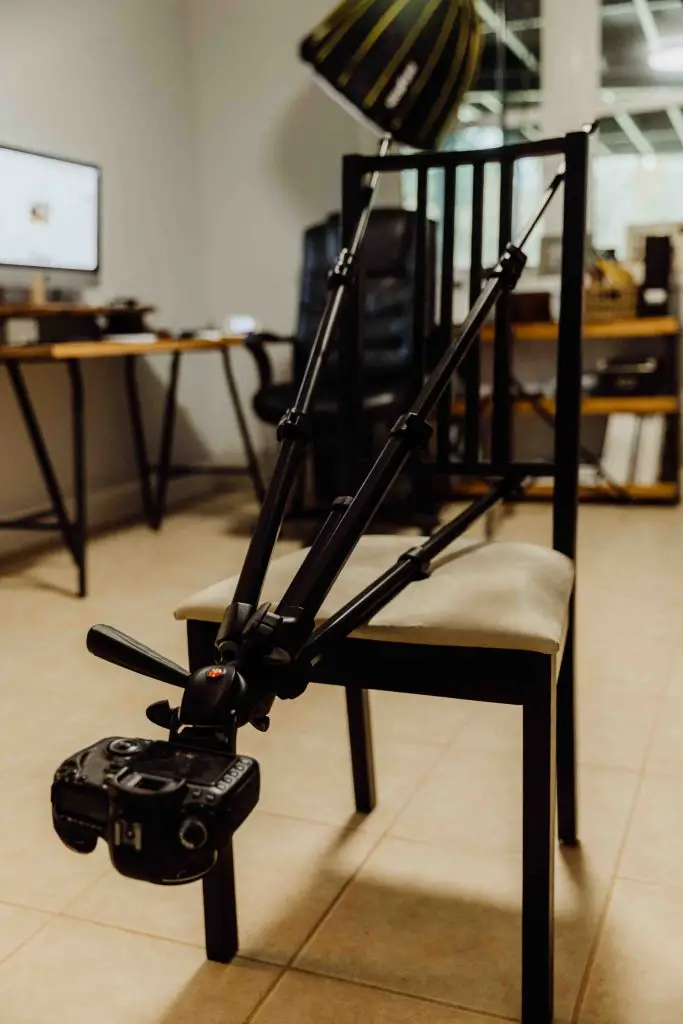
Be very careful to be sure that the tripod is good and secure before attaching the weight of your camera to it. You may even consider adding additional counter weight to the other side of it to make sure it doesn’t tip itself and the chair over with it.
14 | DIY Overhead Camera Rig for Top Down Videos v2
Here’s a more advanced method for creating your own overhead camera rig.
This method is much more sturdy and safe than the first method, which will allow you to capture a greater variety of shots. However, it does require some extra parts from the hardware store, along with a little grunt work.
Follow this video for complete instructions.
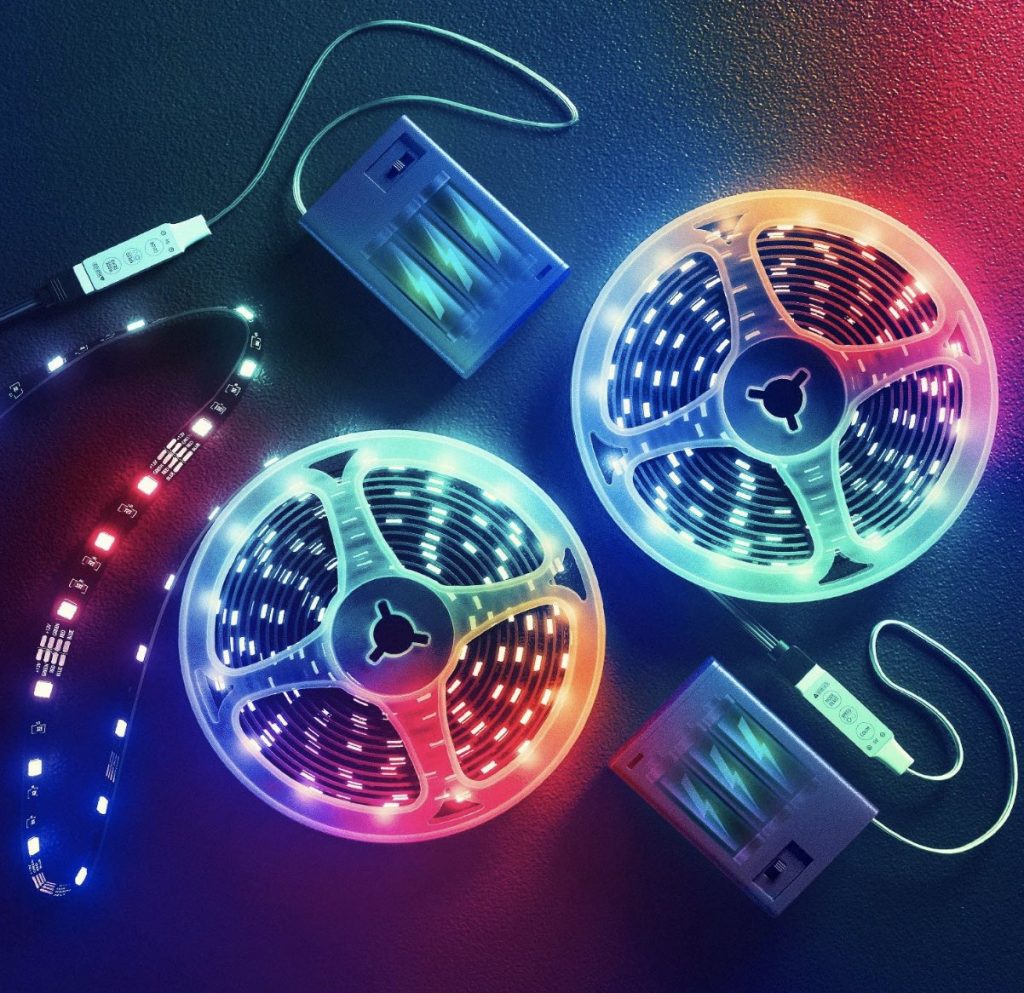
15 | LED lights for camera bag
Ok, admittedly this isn’t a hack that you can make from home, but I wanted to include it on this list because it is so inexpensive and handy for us filmmakers.
Many times we are shooting at dim-lit venues where it isn’t always easy to see all of the essential gear stuffed deep inside our gear bags that you need to grab quickly.
For this reason, attaching a line of LED lights along the upper lining of your camera bag is not only super useful, it will also make you look pretty cool 🙂
Here are some inexpensive ones that I found on amazon that you may want to try out as well.
That sums up our list of do it yourself filmmaking hacks. I hope you’ve found a few of these items helpful. Let me know in the comments below if you have a great filmmaking hacks that I missed.
Happy Shooting!
Beth
Share on Pinterest: