Being in complete control of your audio and music tracks is critical as a video editor. There are many times when you might want the audio to fade in or out at a very specific time, pace, and volume.
The great news is that it’s really quite simple to master in Premiere Pro.
In today’s post I’ll show you the quickest and easiest way to fade audio out in Premiere Pro, step by step.
For this example I’m using an audio clip of loyalty free music that I downloaded from Envato Elements. It’s a monthly subscription that gives you unlimited downloads of music, audio effects, Premiere Pro templates and presets, stock footage, and so much more. I highly recommend it.
Step 1: Import Audio File into Premiere Pro
I’m going to start at the very beginning here, but if you’re ready to get right into fading audio you can skip to step three.
Once you’ve opened up Premiere Pro, go ahead and import your audio file. You can use an .mp3, .wav, or .aiff file.
A few ways to import your audio file:
- Double-Click in your project window to import
- Right-Click in your project window to import
- File -> Import
- Simply drag your file into the project window from a separate window on your computer
Step 2: Place Your Audio File Into Your Timeline
Once your desired audio clip is selected, simply drag it into your sequence window.
If you have not yet created a sequence, Premiere Pro will create one automatically for you once you drag it into the sequence window.
If you have already created a sequence, you can decide which audio track to drag it to. Now we are ready to start adjusting our audio fade in and out.
Step 3: Drag the Desired Audio Transition to the Clip
There are really a few options to fade in and fade out audio in Premiere Pro.
This step will show you the quickest and easiest way to adjust audio. (Skip down to Step 4 for another option that gives you a bit more control.)
- First, make sure your Effects Panel is enabled. If you don’t see it, navigate up to Window -> Effects to open it.
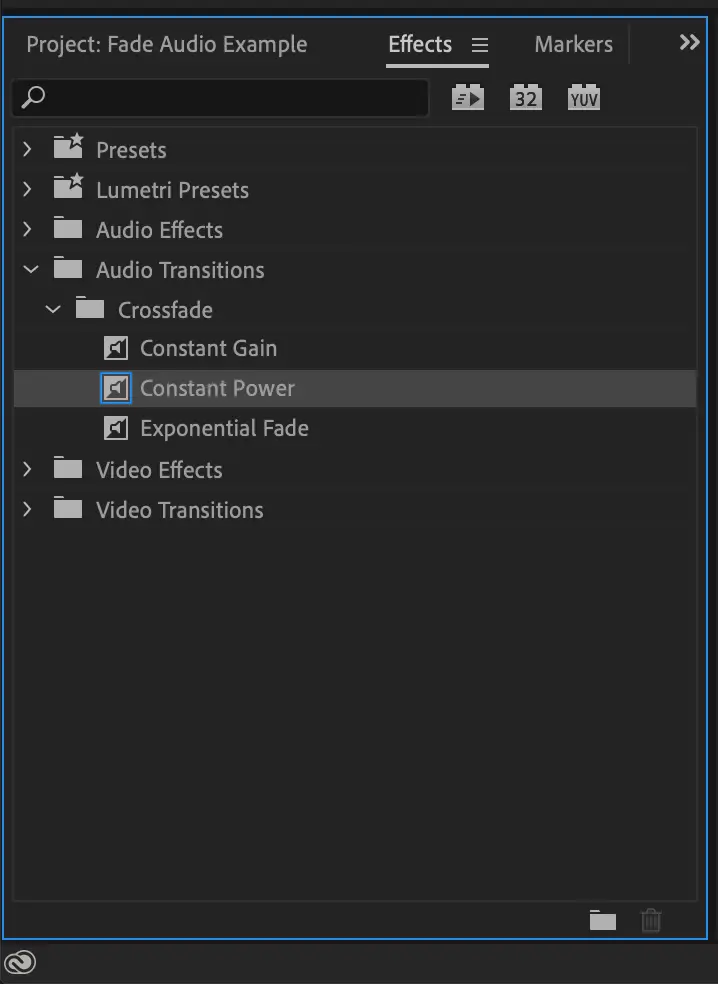
- Once there, select the Audio Transitions dropdown.
- Select Constant Power and drag it onto the beginning or end of your clip where you’d like the audio to fade in or out.
- Keyboard Shortcut: You can also use the keyboard shortcut shift-command-D to add this transition to both the beginning and end of your clip. Just make sure your desired clip is selected when you hit the shortcut.
- Change Duration: You now have the option to change the duration of your audio fade in or fade out.
- Simply click and drag the end of the transition to shorted or lengthen your desired audio fade.
- You can add the same effect at the end of your clip to fade out your audio.
What’s the difference between Constant Gain, Constant Power, and Exponential Fade?
A crossfade is a type of transition where one layer of audio overlaps the other layer of audio while seamlessly raising or lowering in volume at the same time that the overlapped layer does the opposite.
This allows for a smooth transition between two clips of audio.
Constant Gain Crossfade
Constant Gain is used less frequently because it has a tendency to sound abrupt. It works by decreasing (or increasing) audio at a constant rate in and out as it transitions between clips. In contrast to Constant Power, which adjusts the rate of volume more smoothly between clips.
Constant Power Crossfade
The Constant Power crossfade creates a smooth, gradual transition, very similar to the common dissolve transition between video clips.
This crossfade decreases audio for the first clip slowly at first and then quickly toward the end of the transition. For the second clip, this crossfade increases audio quickly at first and then more slowly toward the end of the transition.
Exponential Fade
Lastly, while often overlooked, the exponential fade is actually my favorite on this list. It works by starting the volume transition slowly and then increasing the volume (or decreasing) exponentially until the end, like a curve.
Specifically, it’s helpful at the end of audio clips because it allows for a shorter fade out without sounding too abrupt. It’s also a helpful tool for editing smooth dialogue where you may need to create quick and seamless cuts in between words.
Step 4: Set Keyframes On Your Audio Clip
The following steps will walk you through another, also very simple, way to adjust the audio fade in and fade out in Premiere Pro.
- First, make sure that your audio layer is wide enough to see a gray line in the middle. Do this by grabbing the bottom edge and dragging it to your desired width.
- Next ensure that you’ve selected volume level keyframes. To do this, right click on your audio clip, at the very bottom find Show Clip Keyframes -> Volume -> Level and make sure it’s checked.
- Select the pen tool from the tool panel or simply hit P on your keyboard to enable the pen tool.
- Create a keyframe where you’d like to begin the audio fade out first.
- Next create a second keyframe where you’d like to end the transition.
- Simply drag the second keyframe up or down to your desired volume.

- You can now pick up and drag each of those keyframes as you wish to change the volume level and duration of your fade in or fade out.
- Hint: to slide the entire transition without changing volume or duration, select both keyframes and slide the transition to your desired location while holding down the shift button.
Concluding Thoughts
That’s it! Pretty easy, right? Let me know what you think. There are so many ways to achieve simple tasks in Premiere Pro. These are two quick and easy ways that I often use, but if you have other ideas I’d love to hear them.
-Beth
Share on Pinterest:
